Hyundai Santa Cruz: Air Conditioning System / Condenser
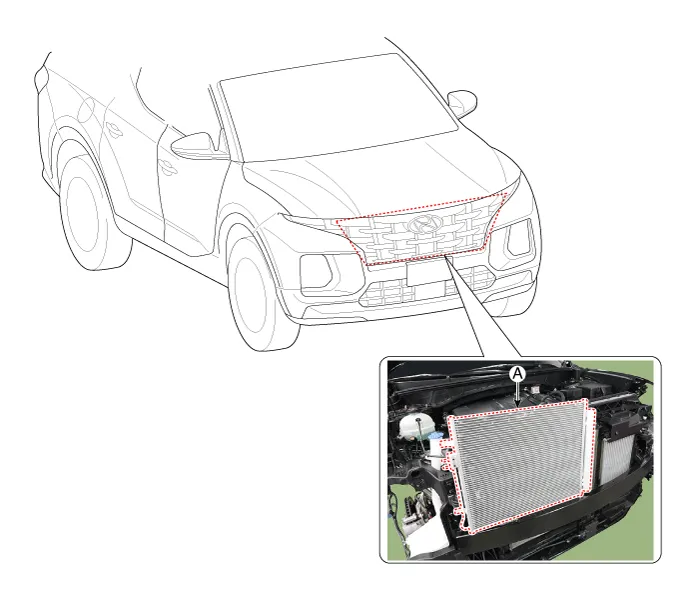
1. Condensor
1.Check the condenser fins for clogging and damage. If clogged, clean them with water, and blow them with compressed air. If bent, gently bend them using a screwdriver or pliers.
2.Check the condenser connections for leakage, and repair or replace it, if required.
1.Recover the refrigerant with a recovery/recycling/charging station.(Refer to Air conditioning System - "Repair procedures")
2.Disconnect the negative (-) battery terminal.
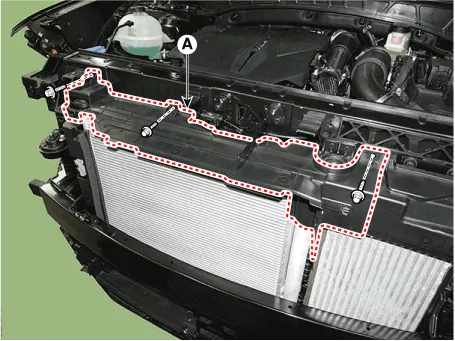
3.Remove the front bumper assembly.(Refer to Body - "Front Bumper Assembly")
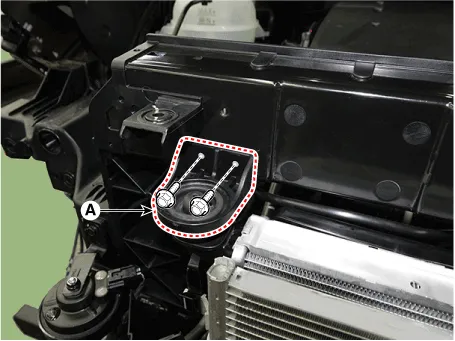
4.Loosen the mounting botls and clips, remove the radiator upper guard (A).
Tightening torque : 7.8 - 11.8 N.m (0.8 - 1.2 kgf.m, 5.8 - 8.7 lb-ft)
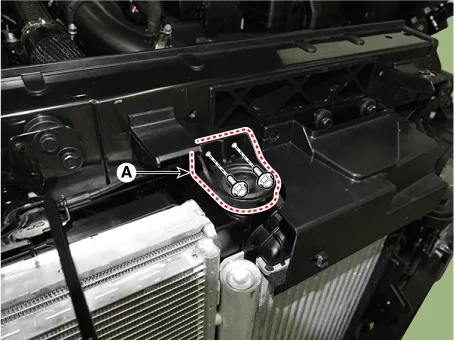
5.Loosen the mounting bolt, remove the upper air guard (A).
Tightening torque : 3.9 - 5.9 N.m (0.4 - 0.6 kgf.m, 2.9 - 4.3 lb-ft)
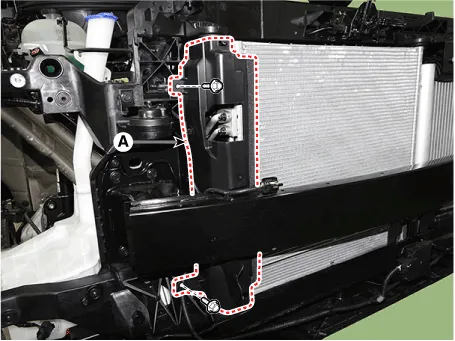
6.Loosen the mounting bolts and then remove the radiator mounting bracket (A).
Tightening torque : 7.8 - 11.8 N.m (0.8 - 1.2 kgf.m, 5.8 - 8.7 lb-ft)
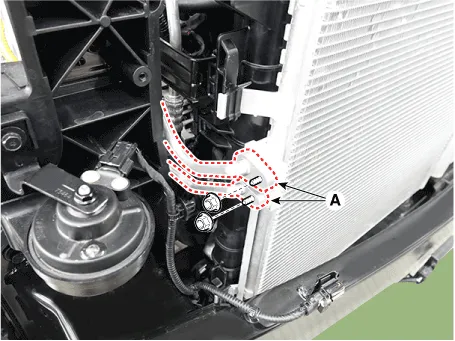
7.Remove the refrigerant pipe & tube assembly (A) after removing the nuts.
Tightening torque :8.8 - 13.7 N.m (0.9 - 1.4 kgf.m, 6.5 - 10.1 lb-ft)
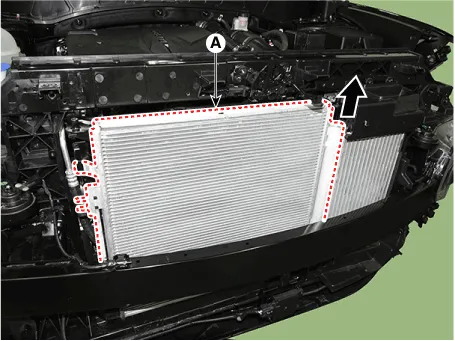
8.Press the lock pin and remove the condenser assembly (A) from radiator assembly.

9.Install in the reverse order of removal.

• If you're installing a new condenser, add refrigerant oil.
• Replace the O-rings with new ones at each fitting, and apply a thin coat of refrigerant oil before installing them. Be sure to use the right O-rings for R-1234yf to avoid leakage.
• Be careful not to damage the radiator and condenser fins when installing the condenser.
• Charge the system, and test its performance.
 Compressor
- Description
The compressor is the power unit of the A/C system.It is located on the
side of engine block and driven by a V-belt of the engine.The
compressor changes low pressure and low tempe ...
 Receiver-Drier
- Replacement
1.Remove the condensor.(Refer to Air conditioning System - "Condensor")
2.Using a Lwrench, remove the cap (A) on the bottom of the receiver-drier.
3.Remove the receiver-drier (A) ...
Other information:
Hyundai Santa Cruz (NX4A OB) 2021-2025 Service Manual: Heater & A/C Control Unit (Manual)
- Terminal Function
Connector Pin Function
Pin NoConnector APin NoConnector A
1Battery17IGN2
2ISG B+18IGN1
3ILL+ (TAIL)19Blower Relay
4Sensor REF (+5V)20Blower INH
5Mode Actuator Feedback21Blower IS
6Temperature Actuator Feedback22Blower PWM IN
7Intake Actuator Feedback23-
8Evaporator ...
Hyundai Santa Cruz (NX4A OB) 2021-2025 Service Manual: Schematic Diagrams
- System Block Diagram
Component Parts And Function Outline
Component partFunction
Vehicle-speed sensor, ESP/ABS Control ModuleConverts vehicle speed to pulse.
ECMReceives signals from sensor and control switches.
Cruise control indicatorIlluminate when CRUISE main switch is ON (Built into ...
