Hyundai Santa Cruz: Heater / Heater Unit
1. Heater unit assembly
1.Disconnect the negative (-) battery terminal.
2.Recover the refrigerant with a recovery/recycling/charging station.(Refer to Air conditioning System - "Repari procedures")
3.When the engine is cool, drain the engine coolant from the radiator.(Refer to Engine Mechanical System - "Coolant")
4.Remove the front wiper motor.(Refer to Body Electrical System - "Front Wiper Motor")
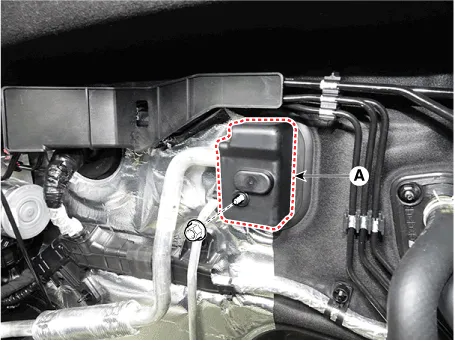
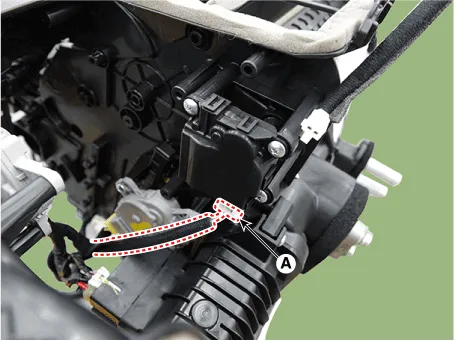
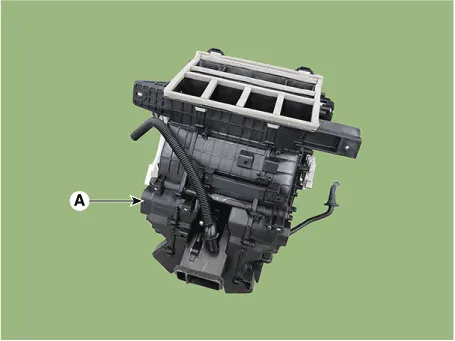
5.Loosen the mounting nut and separate the expension valve cover (A).
Tightening torque : 7.8 - 11.8 N.m (0.8 - 1.2 kgf.m, 5.8 - 8.7 lb-ft)
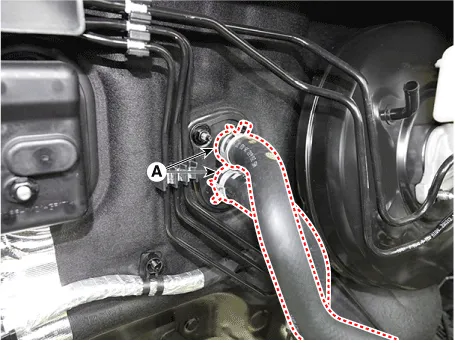
6.Loosen the mounting bolts and separate the expension valve (A) from the evaporator core.
Tightening torque :8.8 - 13.7 N.m (0.9 - 1.4 kgf.m, 6.5 - 10.1 lb-ft)

7.Separate the heater hose (A).
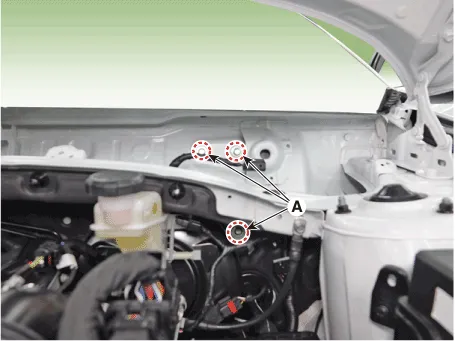
8.Loosen the cowl cross bar assembly mounting bolts (A).
Tightening torque : 16.7 - 25.5 N.m (1.7 - 2.6 kgf.m, 12.3 - 18.8 lb-ft)
9.Remove the front seat assembly.(Refer to Body (Interior and Exterior) - "Front Seat Assembly")
10.Remove the floor console assembly.(Refer to Body (Interior and Exterior) - "Floor Console Assembly")
11.Remove the front pillar trim.(Refer to Body (Interior and Exterior) - "Front Pillar Trim")
12.Remove the cowl side trim.(Refer to Body (Interior and Exterior) - "Cowl Side Trim")
13.Remove the crash pad lower panel.(Refer to Body (Interior and Exterior) - "Crash Pad Lower Panel")
14.Remove the steering column shroud lower panel.(Refer to Body (Interior and Exterior) - "Steering Column Shroud Panel")
15.Remove the steering wheel.(Refer to Steering System - "Steering Wheel")
16.Remove the multifunction switch.(Refer to Body Electrical System - "Multifunction Switch")
17.Lower the steering column after loosening the mounting bolts.(Refer to Steering System - "MDPS PowerPack Assembly")
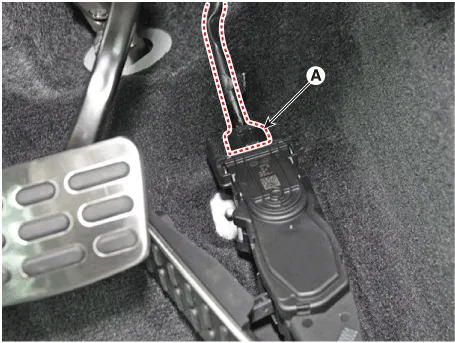
18.Loosen the mounting bolt and nut, remove the accelerator pedal module (A).
19.Press the lock pin, separate the accelerator pedal connector (A).
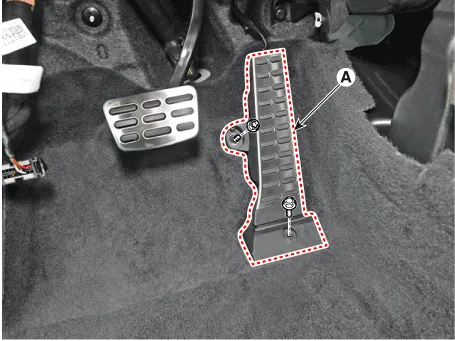
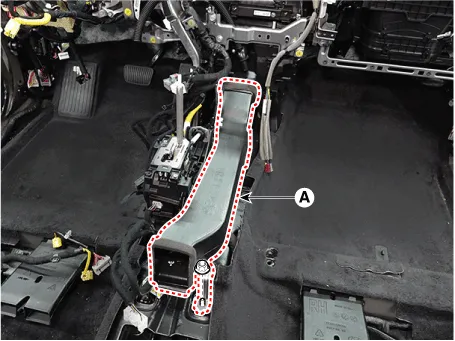
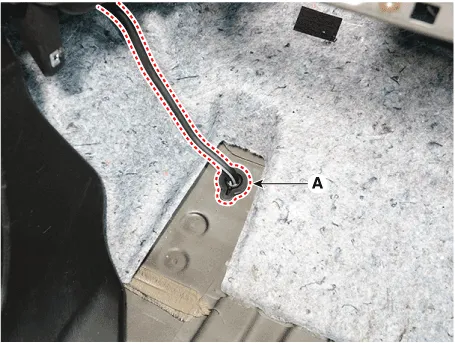
20.Remove the rear air duct (B) and then separate the floor carpet (A) backwards.
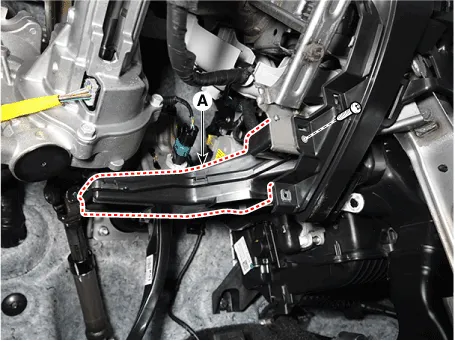
21.Remove the rear heating duct (A).
22.Loosen the mounting nuts and remove the console duct (A).
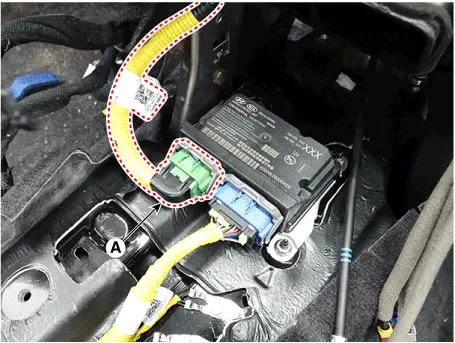
23.Disconnect the airbag control module(SRSCM) connector (A).
24.Loosen the mounting screw, remove the shower duct (A).
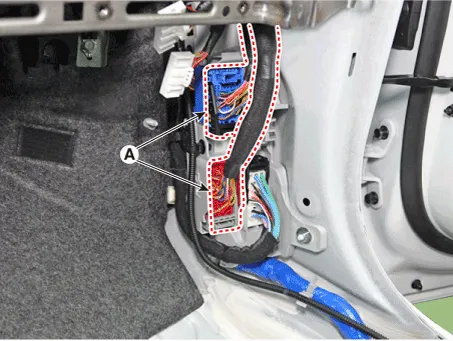
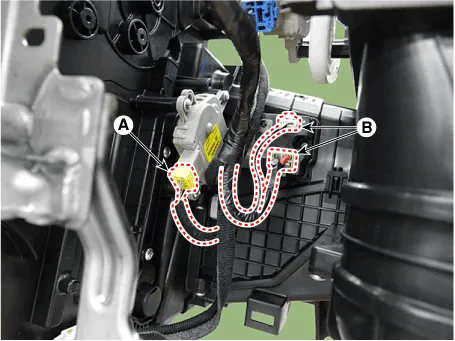
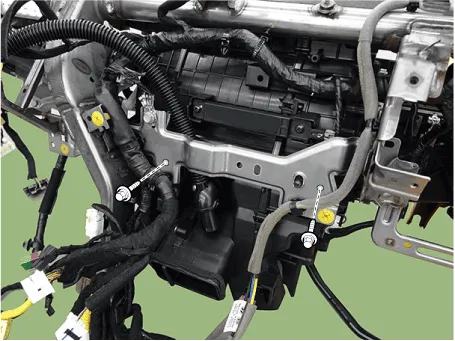
25.Disconnect the passenger compartment junction box connectors (A).
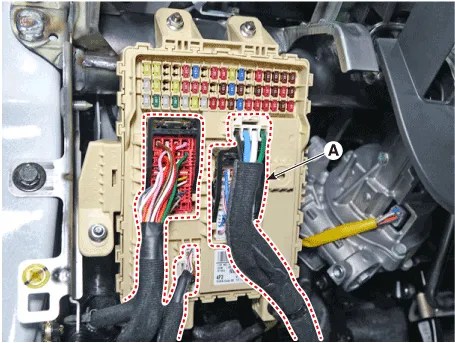
26.Disconnect the multi box connectors (A).
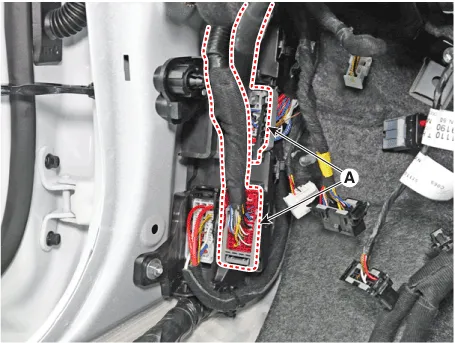
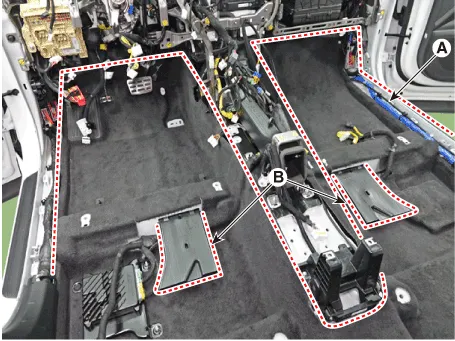
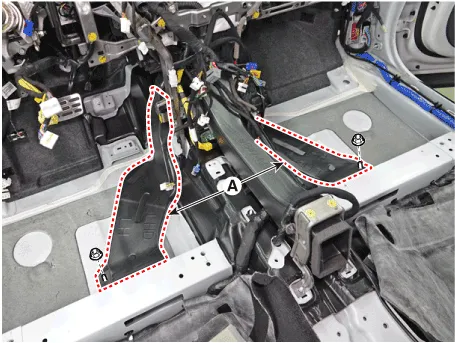
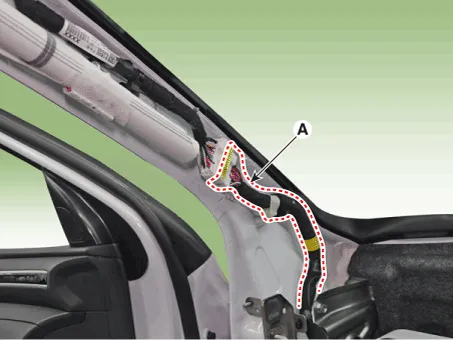
27.Disconnect the connector (A) and the mounting wiring fasteners in the front pillar.

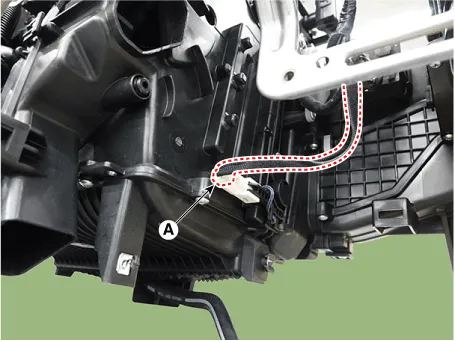
28.Remove the drain hose (A).
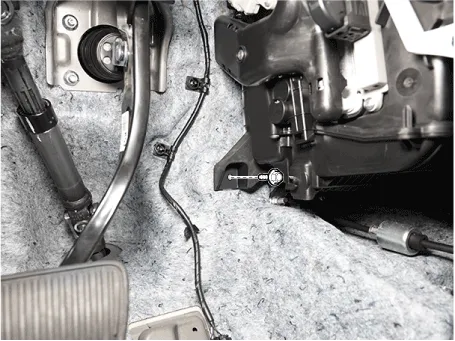
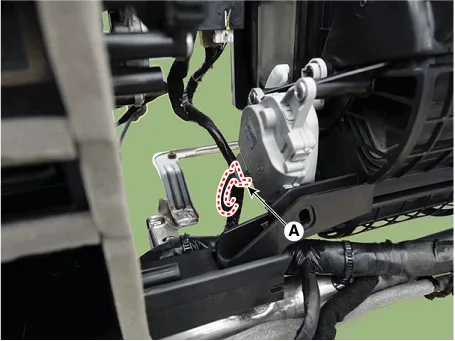
29.Remove the lower mounting bolt of the blower unit.
Tightening torque : 3.9 - 5.9 N.m (0.4 - 0.6 kgf.m , 2.9 - 4.3 lb-ft)
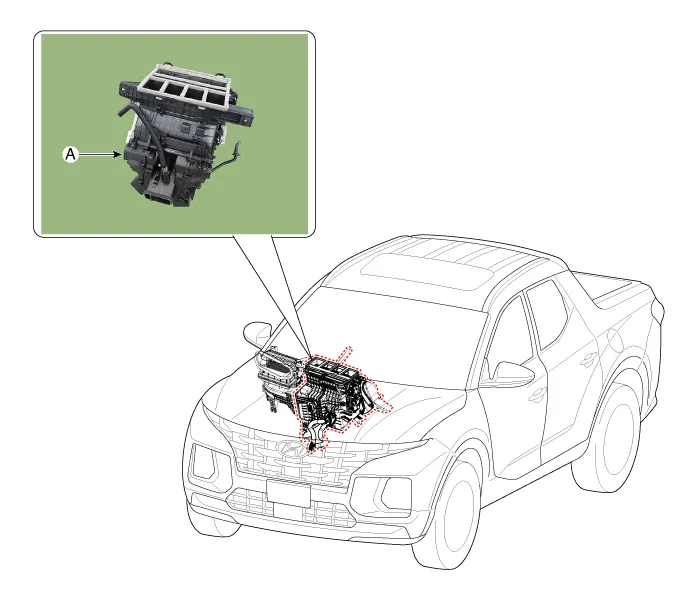
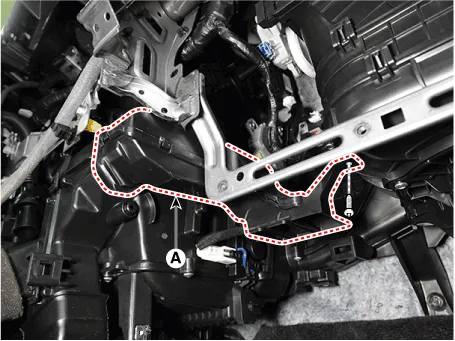
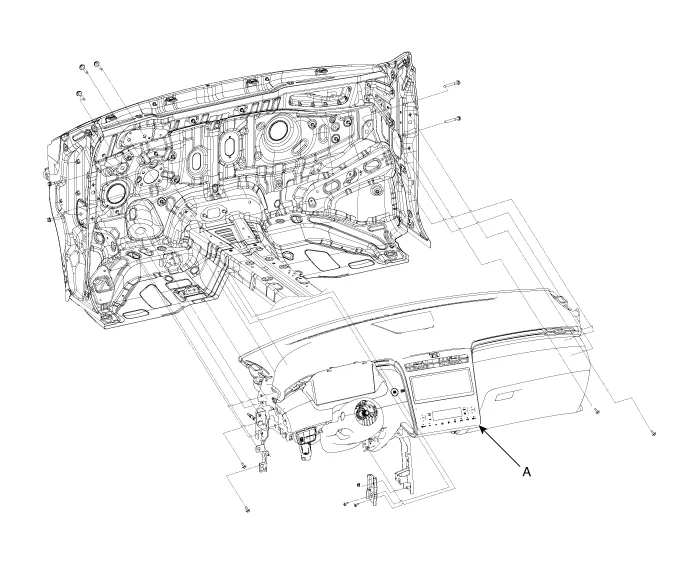
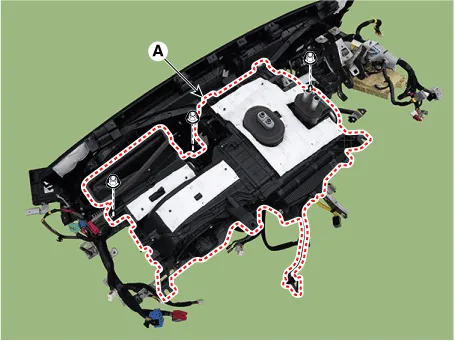
30.After loosening the bolts and nuts remove the crash pad and heater & blower unit assembly (A) together.
31.Remove the IBU.(Refer to Body Electrical System - "Integrated Body Control Unit (IBU)")
32.Remove the heater control unit.(Refer to Controller - "Heater Control Unit")
33.Disconnect the heater and blower unit connectors.
(1)Disconnect the passenger's temperatur actuator connector (A) and PWM module connector (B).
(2)Disconnect the evaporator sensor connector (A).
(3)Disconnect the driver's temperatur actuator connector (A) and mode actuator connector (B), PTC heater connector (C).

(4)Disconnect the blower motor connector (A).
(5)Disconnect the intake actuator connector (A).
(6)Disconnect the auto defogging actuator connector (A).
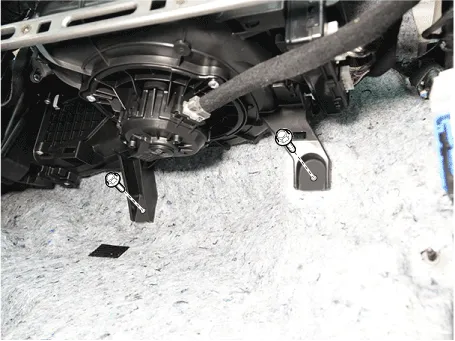
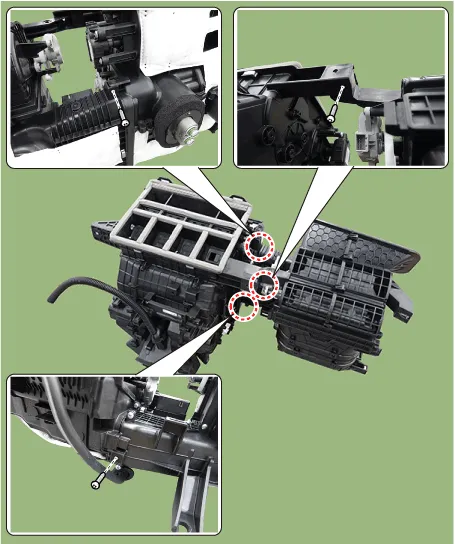
34.Loosen the heater & blower unit mounting bolt (A).
Tightening torque : 3.9 - 5.9 N.m (0.4 - 0.6 kgf.m , 2.9 - 4.3 lb-ft)
35.Loosen the mounting nuts and remove the heater & blower unit (A) from the crash pad.
Tightening torque : 3.9 - 5.9 N.m (0.4 - 0.6 kgf.m , 2.9 - 4.3 lb-ft)
36.Loosen the mounting screw and separate the heater unit (A).
Tightening torque : 3.9 - 5.9 N.m (0.4 - 0.6 kgf.m , 2.9 - 4.3 lb-ft)
37.Install in the reverse order of removal.

• Make sure that each of the assembly components operates properly.
• Replace any damaged clips (or pin-type retainers).
 Heater
...
 Heater Core
- Replacement
1.Disconnect the negative (-) battery terminal.
2.Remove the heater and blower assembly.(Refer to Heater - "Heater Unit")
3.Loosen the mounting screws and remove the heater core c ...
Other information:
Hyundai Santa Cruz (NX4A OB) 2021-2025 Service Manual: Special Service Tools
- Special Service Tools
Tool (Number and Name)IllustrationUse
09581-11000Piston expander
Spreading the front disc brake piston
09527 - 2W110Sensor cap installer
Used for installing wheel speed sensor cap(Use with 09231-H1100)
09231 - H1100Handle
(Use with 09527-2W110)
...
Hyundai Santa Cruz 2021-2025 Owners Manual: Emergency Precautions
Tires
Do not use tire and wheel with different
size and type from the one originally
installed on your vehicle. It can affect the
safety and performance of your vehicle,
which could lead to steering failure or
rollover causing serious injury.
When replacing the tires, be sure to
equip all four ...
