Hyundai Santa Cruz: Bed Lid / Bed Trim Assembly

• When removing with a flat-tip screwdriver or remover, wrap protective tape around the tools to prevent damage to components.
• Put on gloves to prevent hand injuries.
1.Remove the C pillar inner garnish.(Refer to Body Side Molding - "C Pillar Garnish")
2.Remove the bed tonneau cover assembly.(Refer to Bed Lid - "Bed Tonneau Cover Assembly")
3.Loosen the mounting bolts, remove the rail&cleat assembly.
Tightening torque :30.4 N.m (3.1 kgf.m , 22.4 lb-ft)

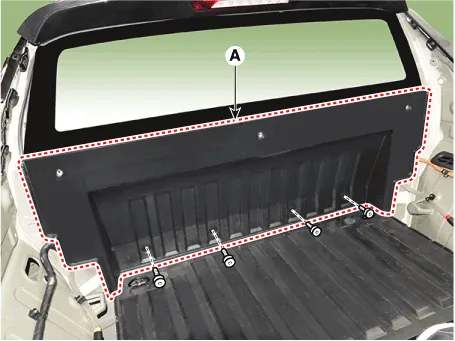
4.Loosen the mounting bolts, remove the bed side panel trim assembly (A).
Tightening torque :(B) : 30.4 N.m (3.1 kgf.m , 22.4 lb-ft)(C) : 52.0 N.m (5.3 kgf.m , 38.3 lb-ft)(D) : 8.8 - 12.7 N.m (0.9 - 1.3 kgf.m , 6.5 - 9.4 lb-ft)
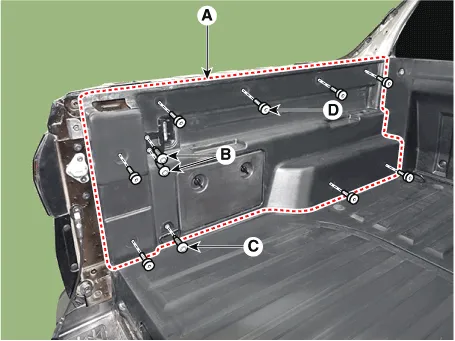
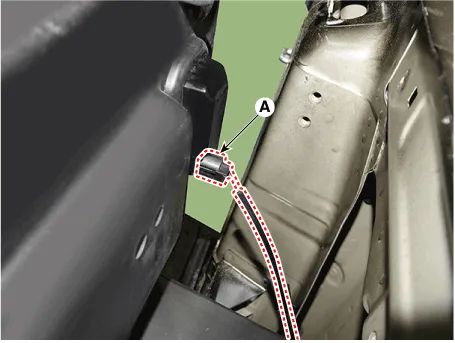
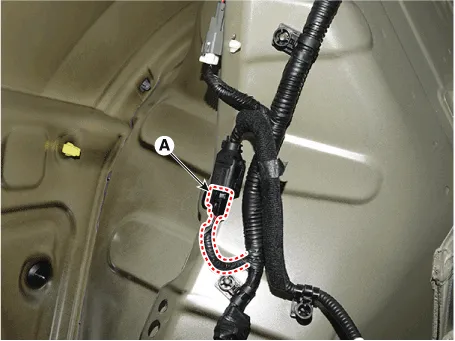
5.Disconnect the bed side panel trim connector (A).
6.To install, reverse removal procedure.

• Make sure the connector is connected properly.
1.Remove the bed side panel trim assembly.
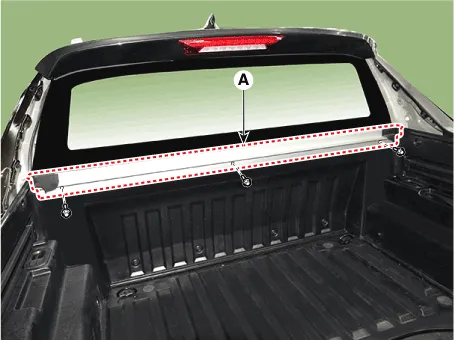
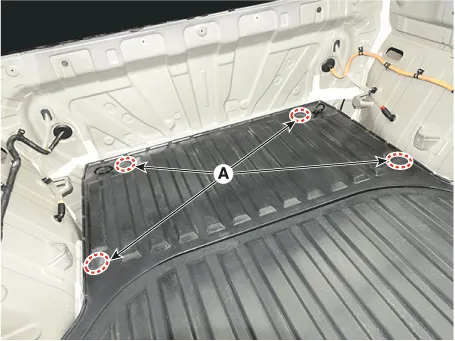
2.Loosen the mounting bolts, remove the bed cross member (A).
Tightening torque :8.8 - 12.7 N.m (0.9 - 1.3 kgf.m , 6.5 - 9.4 lb-ft)
3.Loosen the mounting bolts, remove the bed head board trim assembly (A).
4.To install, reverse removal procedure.
1.Remove the bed head board trim assembly.
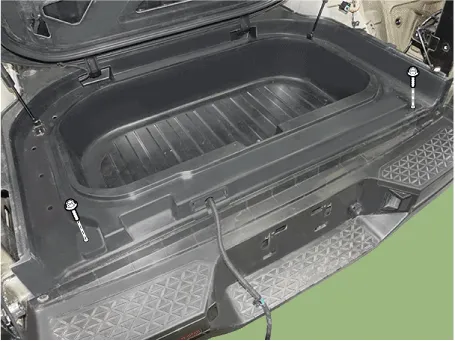
2.Remove the plug holes (A).
3.Loosen the mounting bolts, remove the bed floor trim assembly (A).
Tightening torque :49.0 - 63.9 N.m (5.0 - 6.5 kgf.m , 36.2 - 47.0 lb-ft)
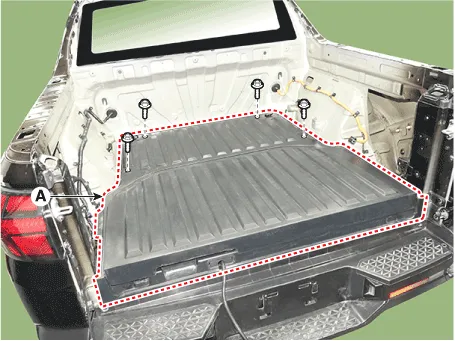
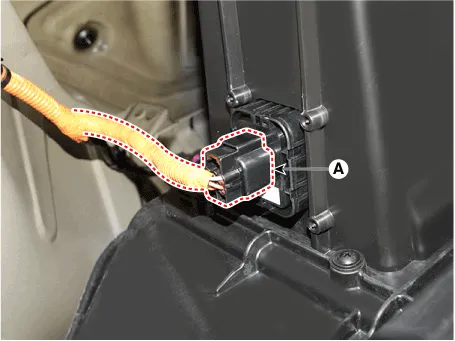
4.Disconnect the bed floor trim connector (A).
5.To install, reverse removal procedure.

• Make sure the connector is connected properly.
 Bed Lid Assembly
...
 Bed Cleat Assembly
- Replacement
• When removing with a flat-tip screwdriver or remover, wrap protective tape around the tools to prevent damage to components.
• Put on gloves to prevent h ...
Other information:
Hyundai Santa Cruz 2021-2025 Owners Manual: Cabin Air Filter
Filter Inspection
The cabin air filter should be replaced
according to the Maintenance Schedule.
If the vehicle is operated in severely airpolluted
cities or on dusty rough roads
for a long period, it should be inspected
more frequently and replaced sooner.
Replace the cabin air filter by foll ...
Hyundai Santa Cruz (NX4A OB) 2021-2025 Service Manual: Sunroof Sunshade
- Replacement
1.Remove the sunroof assembly.(Refer to Sunroof - "Sunroof Assembly")
2.Remove the drip rail (A).
3.Remove the rear drip (A).
4.Remove the sunshade stoper (A).
5.Remove the sunroof sunshade (A) by pushing it backward.
6.To install, reverse the removal procedure. ...
