Hyundai Santa Cruz: Cooling System / Cooling Fan
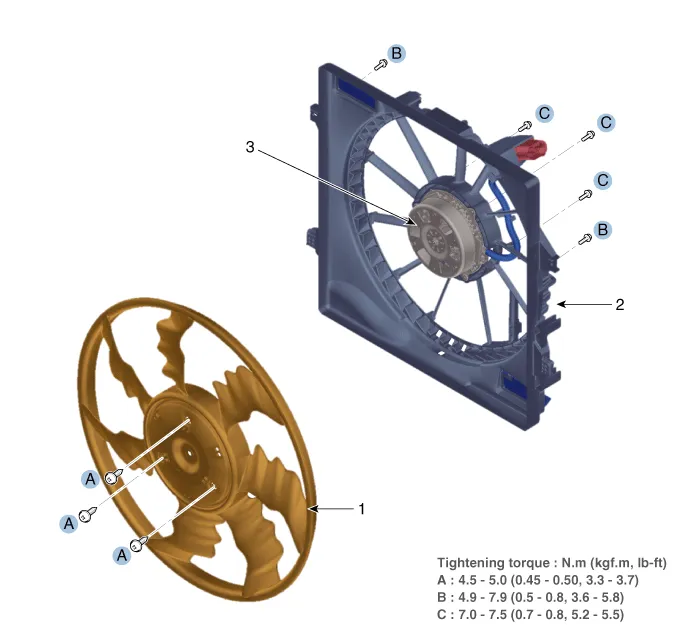
1. Cooling fan
2. Cooling fan shroud
3. Cooling fan motor
1.Disconnect the battery negative terminal.
2.Remove the air cleaner assembly.(Refer to Intake and Exhaust System - "Air Cleaner")
3.Remove the front bumper assembly.(Refer to Body (Interior and Exterior) - "Front Bumper Assembly")
4.Drain the coolant.(Refer to Cooling System - "Coolant")
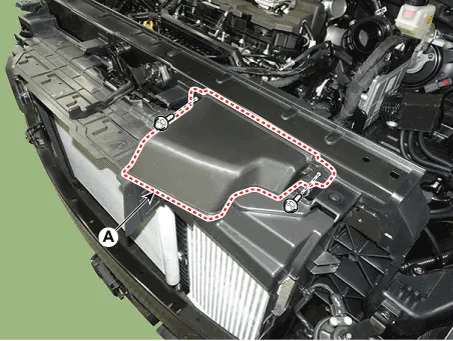
5.Remove the air intake shield (A).
Tightening torque :7.8 - 11.8 N.m (0.8 - 1.2 kgf.m, 5.8 - 8.7 lb-ft)
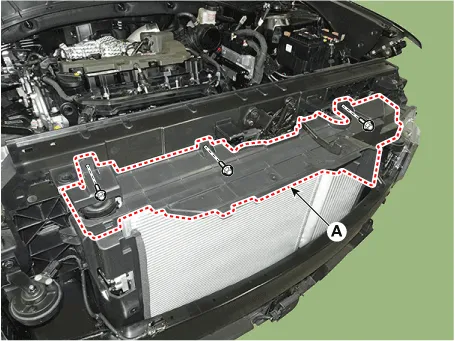
6.Remove the radiator upper air guard (A).
Tightening torque :7.8 - 11.8 N.m (0.8 - 1.2 kgf.m, 5.8 - 8.7 lb-ft)
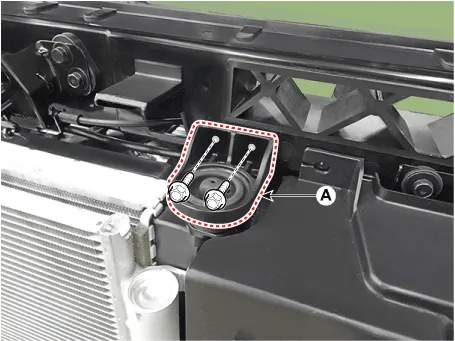
7.Remove the radiator upper mounting bracket (A).
Tightening torque :7.8 - 11.8 N.m (0.8 - 1.2 kgf.m, 5.8 - 8.7 lb-ft)

8.Remove the front bumper beam assembly.(Refer to Body (Interior and Exterior) - "Front Bumper Beam Assembly")
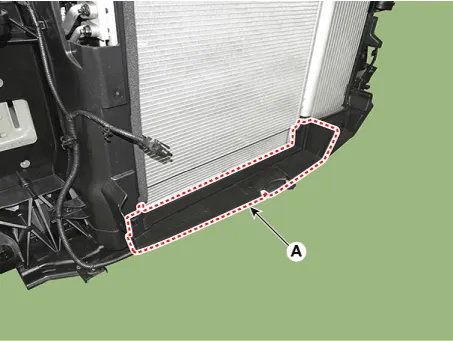
9.Remove the radiator lower air guard (A).
Tightening torque :7.8 - 11.8 N.m (0.8 - 1.2 kgf.m, 5.8 - 8.7 lb-ft)
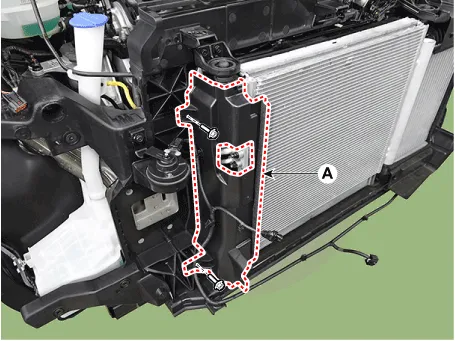
10.Remove the radiator RH side air guard (A).
Tightening torque :3.9 - 5.9 N.m (0.4 - 0.6 kgf.m, 2.9 - 4.3 lb-ft)
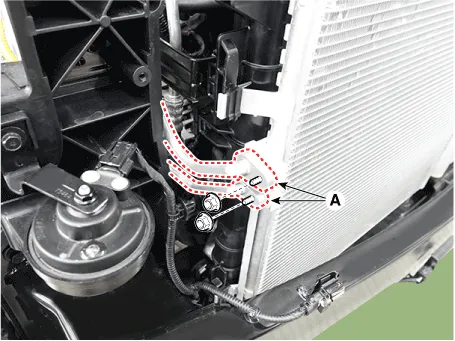
11.Loosen the mounting nuts and separate the discharge line and liquid line (A) from the condensor.
Tightening torque :8.8 - 13.7 N.m (0.9 - 1.4 kgf.m, 6.5 - 10.1 lb-ft)
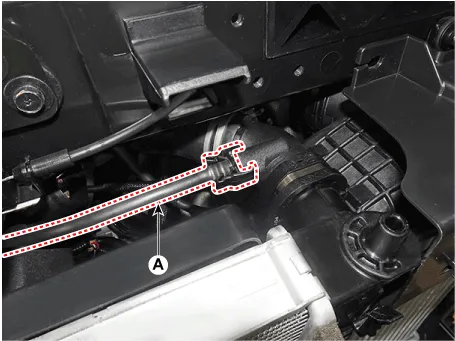
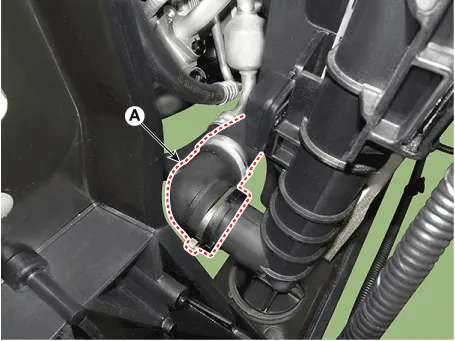
12.Disconnect the over flow hose (A).
13.Disconnect the radiator upper hose (A).
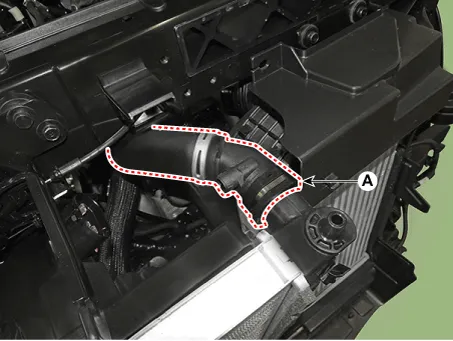
14.Disconnect the radiator lower hose (A).
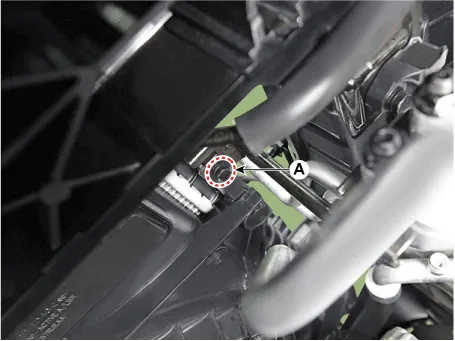
15.Remove the A/C pipe bracket mounting bolt (A).
Tightening torque :7.8 - 11.8 N.m (0.8 - 1.2 kgf.m, 5.8 - 8.7 lb-ft)
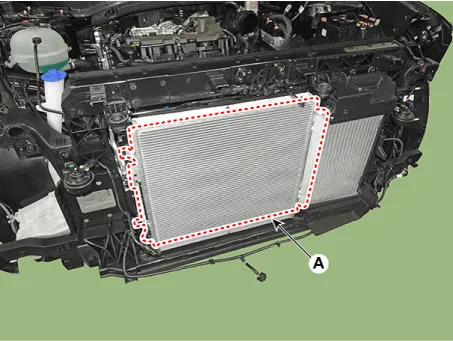
16.Separate the condenser (A) from the radiator.
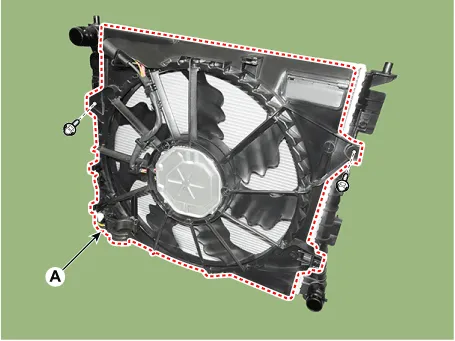
17.Remove the cooling fan & radiator assembly.
18.Separate the cooling fan (A) from the radiator.
Tightening torque :4.9 - 7.9 N.m (0.5 - 0.8 kgf.m, 3.6 - 5.8 lb-ft)
19.Install in the reverse order of removal.
20.Fill with the coolant. (Refer to Cooling System - "Coolant")

• The coolant must be injected according to the integrated thermal management module (ITM) coolant filling method.
21.Start engine and check for leaks.
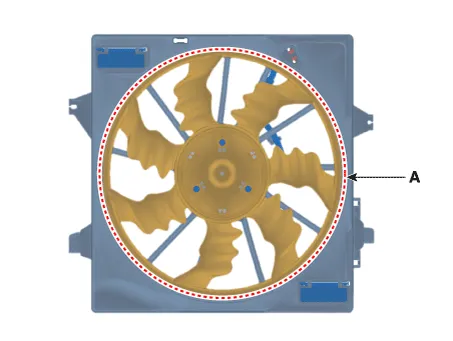
1.Remove the cooling fan (A) from the cooling fan shroud.
Tightening torque :4.5 - 5.0 N.m (0.45 - 0.50 kgf.m, 3.3 - 3.7 lb-ft)
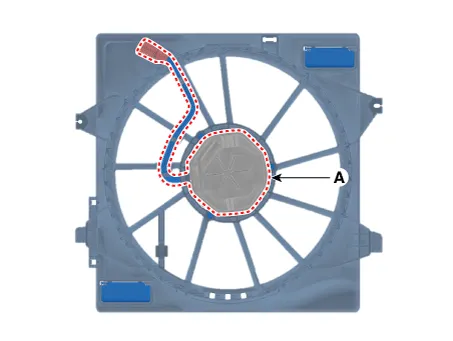
2.Remove the cooling fan motor (A) from the cooling fan shroud.
Tightening torque :7.0 - 7.5 N.m (0.7 - 0.8 kgf.m, 5.2 - 5.5 lb-ft)
3.Install in the reverse order of removal.
1.Turn the ignition switch "OFF" and connect the diagnostic tool to the data link connector.
2.With the gear shift in P (Park) position and ignition switch "ON" (LED of the Power button illuminates in Red), select the "force drive" function.
3.Force drive the cooling fan motor.

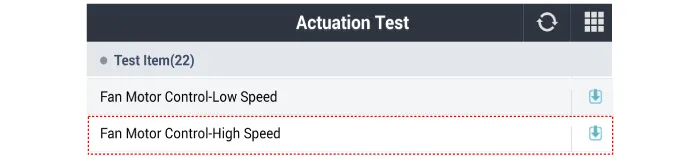
• There are two functions for the fan motor force drive: Low speed and high speed.
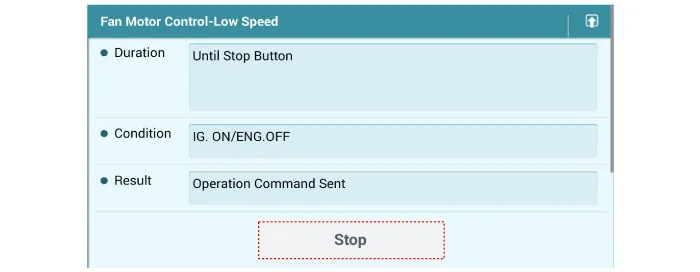
1)Start the "Fan motor low speed" of the force drive function.
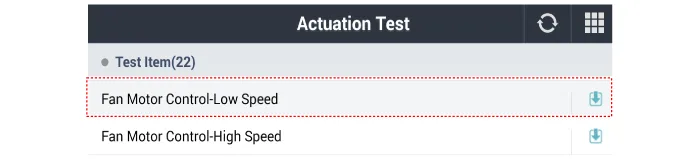
2)Force drive by pressing the start button.
3)Visually check the operation of the cooling fan.
4)Stop the force drive by pressing the stop button.
1)Start the "Fan motor high speed" of the force drive function.
2)Force drive by pressing the start button.
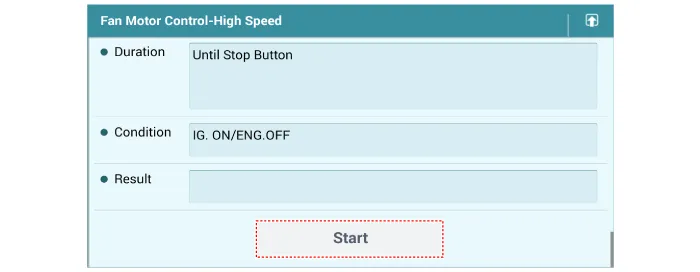
3)Visually check the operation of the cooling fan.
4)Stop the force drive by pressing the stop button.

 Coolant
- Replacement and Air Bleeding
• Never remove the reservoir tank cap when the engine is hot.
Otherwise, serious scalding could be caused by hot fluid under high
pressure e ...
 Radiator
- Components
1. Radiator upper air guard 2. Radiator lower hose3. Radiator upper hose4. Radiator RH side air guard 5. Radiator lower air guard 6. Radiator upper mounting bracket 7. Radiator lowe ...
Other information:
Hyundai Santa Cruz 2021-2025 Owners Manual: Good Driving Practices
Never move the shift lever from P
(Park) or N (Neutral) to any other
position with the accelerator pedal
depressed.
Never move the shift lever into P
(Park) when the vehicle is in motion.
Be sure the vehicle is completely
stopped before you attempt to shift
into R (Reverse) or D (Dr ...
Hyundai Santa Cruz 2021-2025 Owners Manual: Navigation-based Smart Cruise Control (NSCC)
Navigation-based Smart Cruise
Control uses roadway information that
is available on certain highways to
automatically adjust your cruise control
set speed.
There are two important features that
make up the Navigation-based Smart
Cruise Control - Highway Auto Speed
Change and Highway Auto Curv ...
