Hyundai Santa Cruz: Dual Clutch Control System / Shift Cable
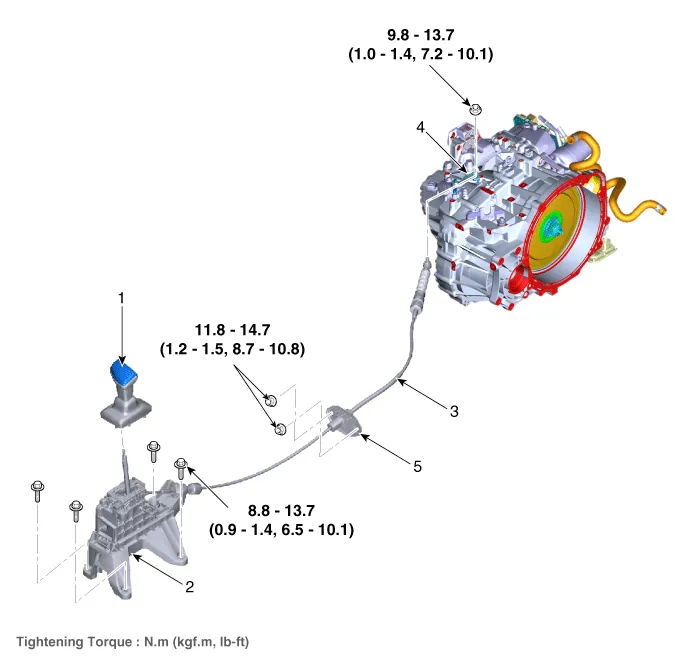
1. Shift lever knob & boots assembly
2. Shift lever assembly
3. Shift cable
4. Manual control lever
5. Shift cable retainer
1.Turn ignition switch OFF and disconnect the negative (-) battery cable.
2.Remove the air cleaner assembly and air duct.(Refer to Engine Mechanical System - "Air cleaner")
3.Remove the ECM.(Refer to Engine Control / Fuel System - "Engine Control Module (ECM)")
4.Remove the battery and battery tray.(Refer to Engine Electrical System - "Battery")
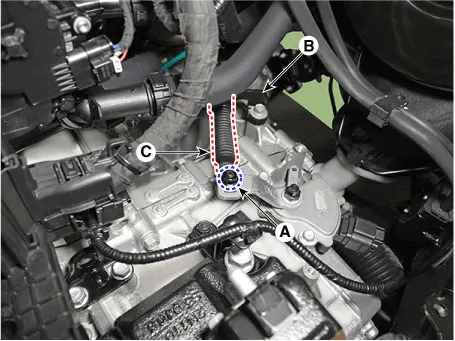
5.Remove the shift cable (C) from the cable bracket (B), after loosening the mounting nut (A).
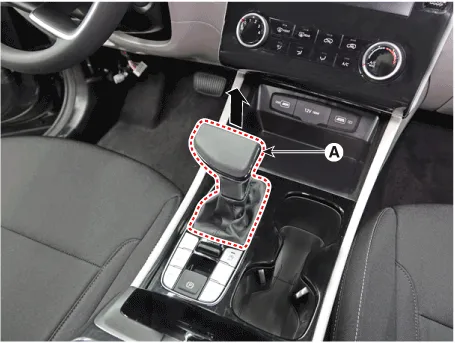
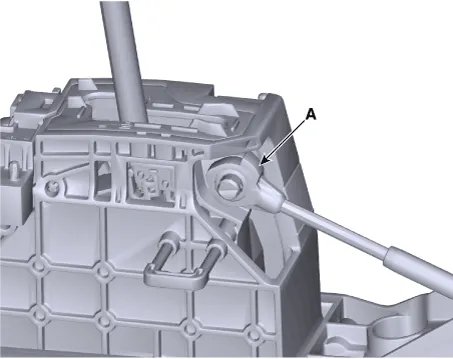
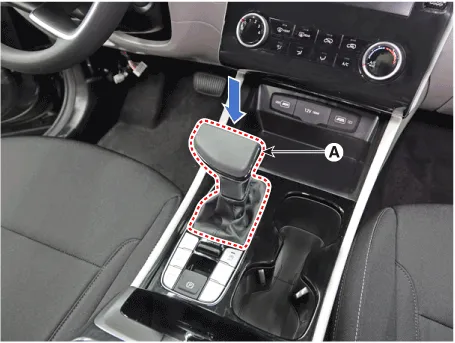
6. Remove the shift lever knob & boots (A) pull both of it up.
7. Remove the floor console assembly.(Refer to Body (Interior and Exterior) - "Floor Console")
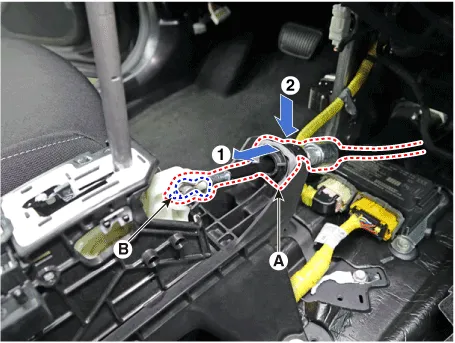
8.Disconnect the shift cable (A) after removing the snap pin (B).
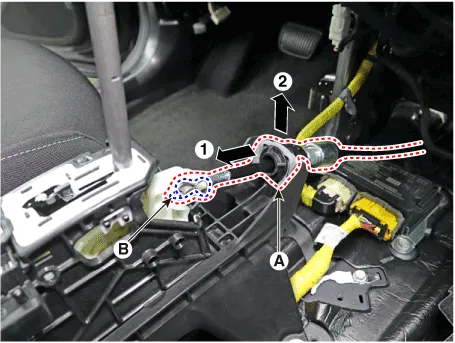
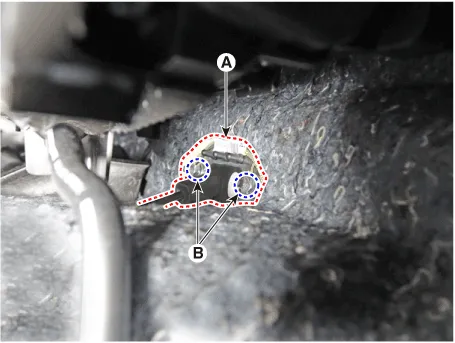
9.Remove the retainer (A) by loosening the nuts (B-2ea).

10.Remove the shift cable from the vehicle.
1.Install the retainer (A) and then tighten the nut (B-2ea).
Tightening torque : 9.8 - 13.7 N.m (1.0 - 1.4 kgf.m, 7.2 - 10.1 lb-ft)
2.Install the shift cable (A) and then fix the snap pin (B).

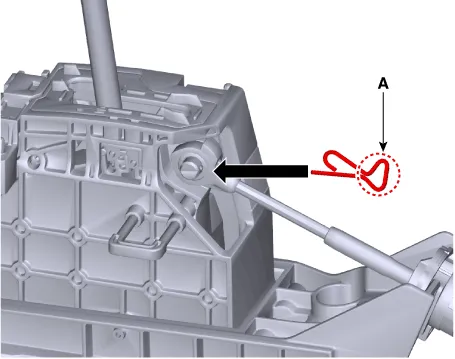
• When assembling shift cable, the projection (A) must face upwards.
• When assembling the snap pin, be careful about the correct direction.
– The band portion (A) must point to the front of the vehicle.
– The band portion (A) must point outwards.
3.(Refer to Body (Interior and Exterior) - "Floor Console")(Refer to Body - "Floor Console")
4.Install the shift lever knob & boots (A).
5.Install the shift cable (A) in the cable bracket (B).
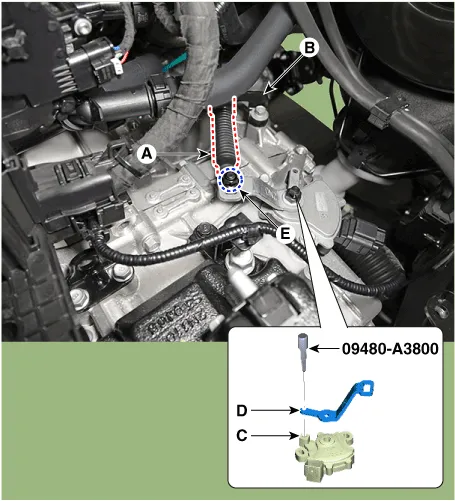
6.Align the hole (C) in the manual control lever with the "N" position hole (D) of the position switch and then insert the position switch guide pin (SST No.:09480-A3800).
7.Lightly tighten the nut (E) after connected the shift cable (A) in the manual control lever.
8.Push shift cable (A) lightly to "F" direction shown to eliminate free play of shift cable.
9.Tighten the nut (E) with the specified torque.
Tightening torque : 9.8 - 13.7 N.m (1.0 - 1.4 kgf.m, 7.2 - 10.1 lb-ft)
10.Remove the position switch guide pin (SST No.:09480-A3800) from the hole.
11.Install the battery and tray.(Refer to Engine Electrical System - "Battery")
12.Install the ECM.(Refer to Engine Control / Fuel System - "Engine Control Module (ECM)")
13.Install the air cleaner assembly and air duct.(Refer to Engine Mechnical System - "Air cleaner")

• Check that operating surely at each range of the position switch corresponding to each position of shift lever.
 Shift Lever
- Components
1. Shift lever knob & boots assembly2. Shift lever assembly3. Shift cable4. Manual control lever5. Shift cable retainer
- Removal
1.Remove the shift lever knob & boot ...
 Position Switch
- Description
• Component Location : Dual Clutch Transmission assembly
• Function
– - The position switch mounted on the upper of transmission and connected with shifter lever.
†...
Other information:
Hyundai Santa Cruz (NX4A OB) 2021-2025 Service Manual: General Information
- General Information
The supplemental restraint system (SRS) is designed to supplement the
seat belt to help reduce the risk or severity of injury to the driver
and passenger by activating and deploying the driver, passenger, side
airbag and belt pretensioner in certain frontal or side col ...
Hyundai Santa Cruz 2021-2025 Owners Manual: Washer Fluid
Checking the Washer Fluid Level
Check the fluid level in the washer fluid
reservoir and add fluid if necessary.
Plain water may be used during summer
months if washer fluid is not available.
However, use washer solvent with
antifreeze characteristics in cold climates
to prevent freezing.
WARN ...
