Hyundai Santa Cruz: ESC (Electronic Stability Control) System / ESC (Electronic Stability Control) Module
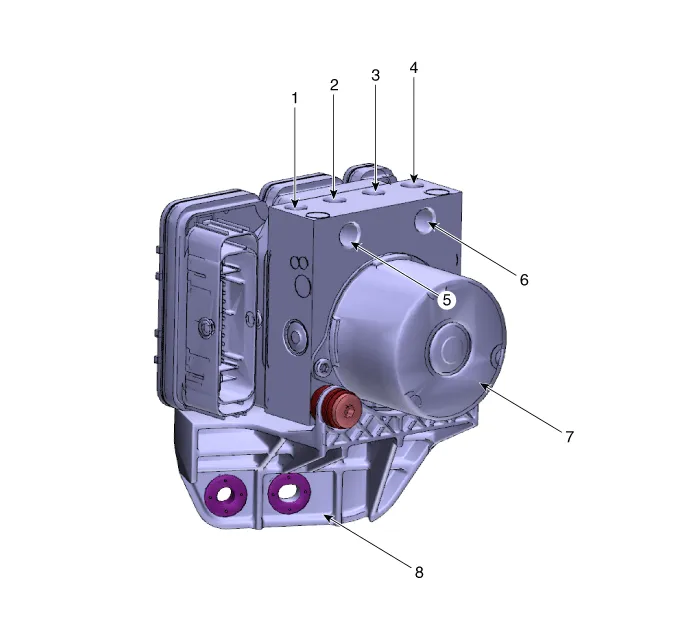
1. Front - right (FR)
2. Rear - left (RL)
3. Rear - right (RR)
4. Front - left (FL)
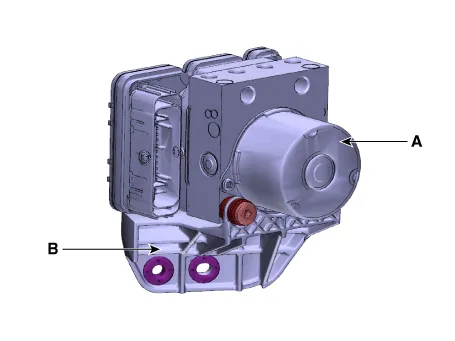
5. MC2
6. MC1
7. ESC Control unit (HECU) connector
8. Bracket
1.Disconnect the battery negative ( - ) terminal.
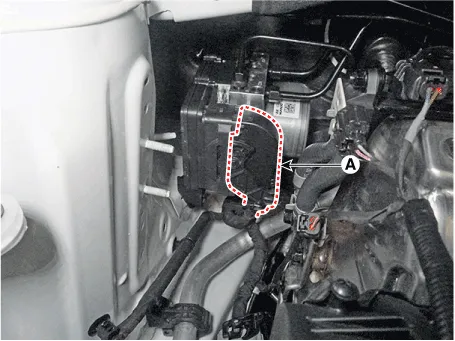
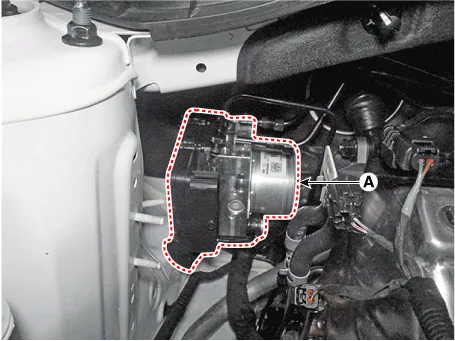
2.Pull up the lock of the ESC control unit (HECU) connector and then disconnect the connector (A).
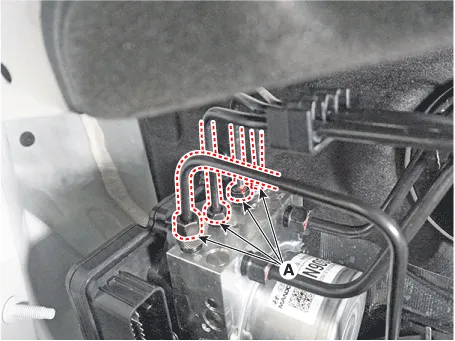
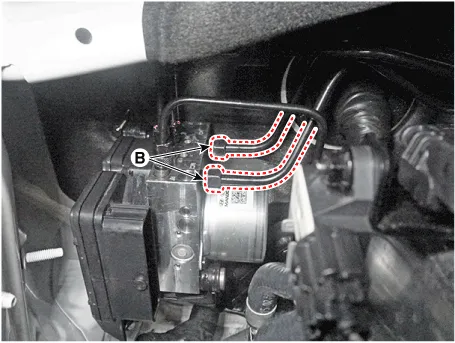
3.Separate the brake tube by removing the flare nuts (A), (B) connected to the ESC control unit (HECU).
Tightening torque :(A) : 13.7 - 16.7 N·m (1.4 - 1.7 kgf·m, 10.1 - 12.3 lb·ft)(B) : 18.6 - 22.6 N·m (1.9 - 2.3 kgf·m, 13.7 - 16.6 lb·ft)
4.Remove the bracket mounting nuts and remove the ESC control unit (HECU) (A) from the vehicle.
Tightening torque :16.7 - 25.5 N·m (1.7 - 2.6 kgf·m, 12.3 - 18.8 lb·ft)
5.Remove the bolts to remove the bracket (B) from the ESC control unit (HECU) (A).
1.Install in the reverse order of removal.
2.After installation, bleed the brake system. (Refer to Brake System - "Brake Bleeding Procedures")
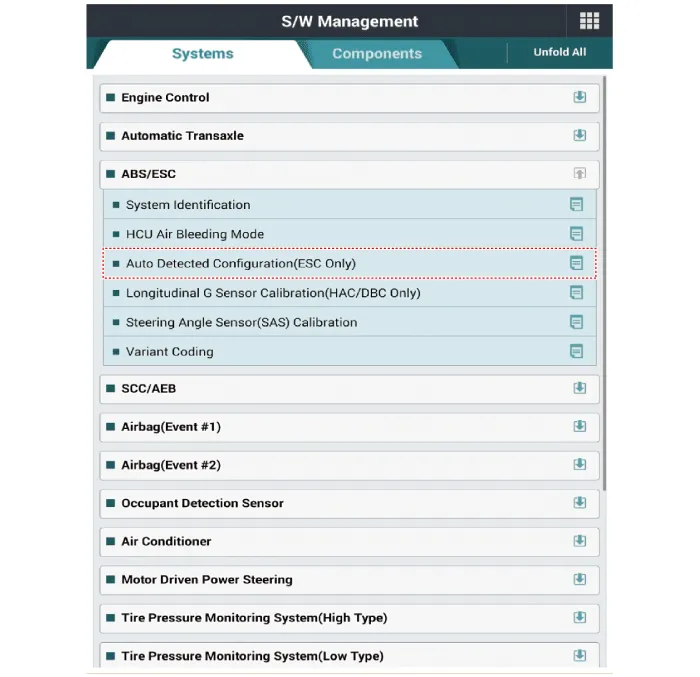
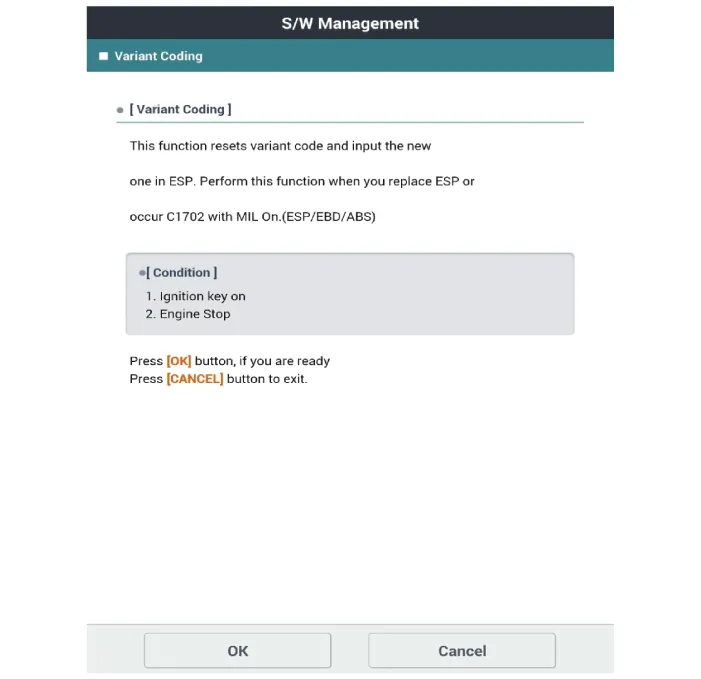
3.Conduct the Variant Coding.
4.Conduct the Auto Detected Sensor Calibration.
5.Conduct the Longitudinal G Sensor Calibration.
6.After replacing the ESC control unit execute the "Assembly Check (ECU replacement)" of the additional function to check that the mounting is successful.
1.Connect self-diagnosis connector (16pins) located under the driver side crash pad to self-diagnosis device, and then turn the self-diagnosis device after key is ON.
2.Select the "vehicle model" and "ABS/ESC" on diagnostic tool vehicle selection screen, then select OK.

 Schematic Diagrams
- Terminal Function
ABS / ESC
PIN NoDesciption CurrentResistance
1Pump motor supply voltage137 A10 MΩ
2Main CAN Low30 mA250 mΩ
3---
4-- -
4---
5---
6---
7---
8---
9---
10- --
...
 ESC OFF Switch
- Description
1.The ESC OFF switch is for the user to turn off the ESC system.
2.The ESC OFF lamp is on when ESC OFF switch is engaged.
- Removal
1.Disconnect the battery negative ( - ) ter ...
Other information:
Hyundai Santa Cruz (NX4A OB) 2021-2025 Service Manual: Description and Operation
- Description and Operation
Blcok Diagram
• This system monitors the driving situations through the front
view camera and front radar. Thus, for a situation out of the sensing
range, the system may not normally operate.
The System may be limited when :
• The rad ...
Hyundai Santa Cruz (NX4A OB) 2021-2025 Service Manual: Power Window Switch
- Removal
Driver Power Window Main Switch
1.Disconnect the negative (-) battery terminal.
2.Remove the front door trim.(Refer to Body - "Front Door Trim")
3.Remove the power window main switch assembly (A).
Assist/Rear Power Window Switch
1.Disconnect the negative (-) battery terminal.
...
