Hyundai Santa Cruz: Brake System / Rear Disc Brake
1.Before removing the rear caliper, perform “Brake Pad Replacement Mode” using the self-diagnosis.Raise the vehicle, and make sure it is securely supported.
• Release the EPB, push the EPB switch or using self-diagnosis.
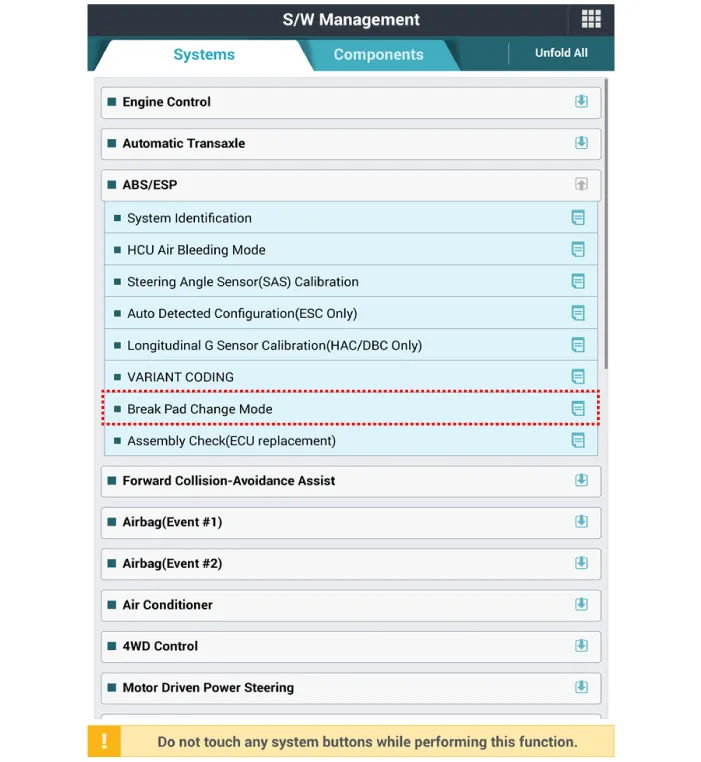
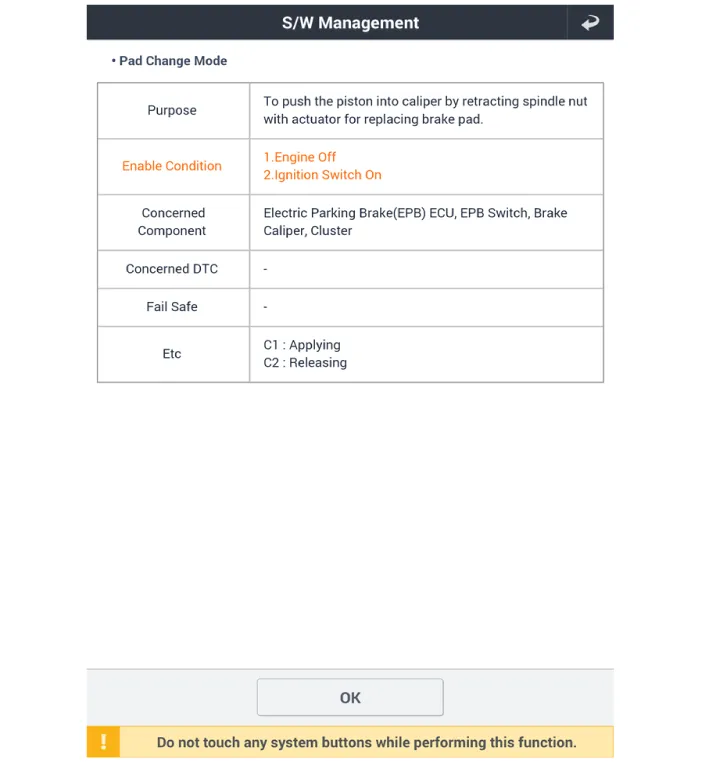
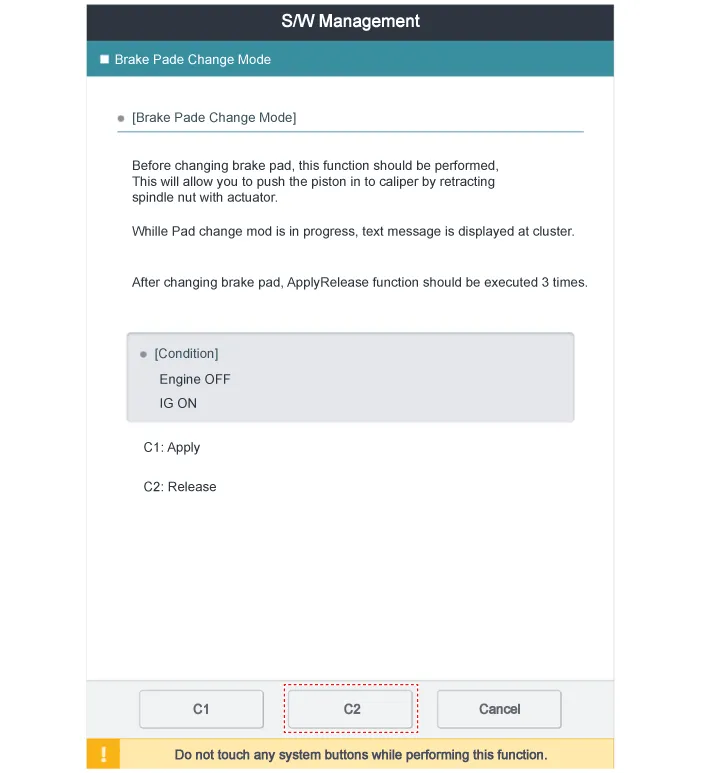
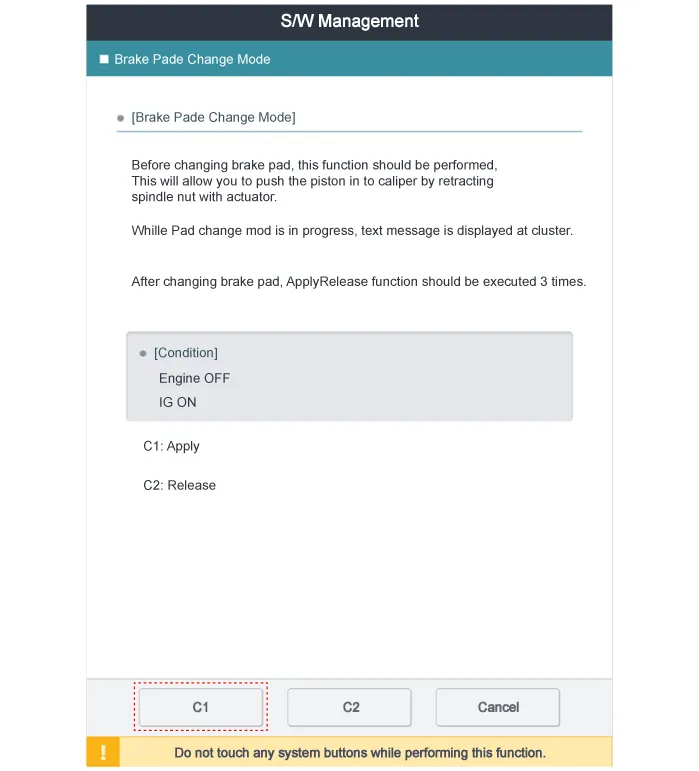
2.Select C2 (Release) on the screen below.
3.Turn ignition switch OFF and disconnect the negative (-) battery cable.
4.Loosen the wheel nuts slightly.Raise the vehicle, and make sure it is securely supported.
5.Remove the rear wheel and tire.(Refer to Suspension System - "Wheel")
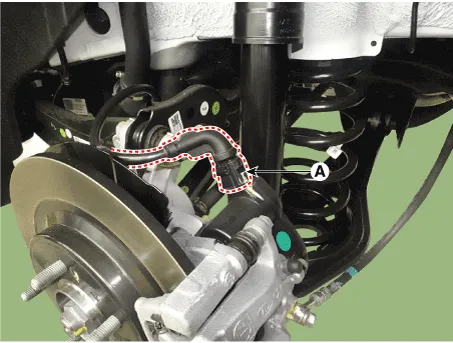
6.Disconnect the EPB connector (A).
7.Remove the guide rod bolt and then pivot the caliper body (A) up out of the way.
Tightening torque :37.2 - 41.1 N.m (3.8 - 4.2 kgf.m, 27.4 - 30.3 lb-ft)
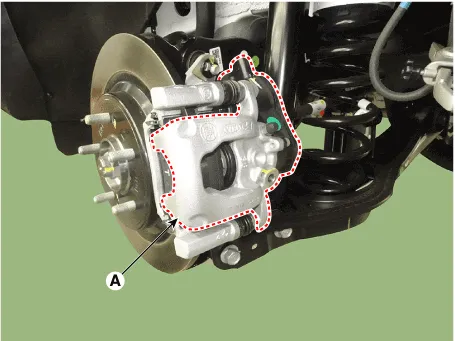
8.Remove the brake pad (A).
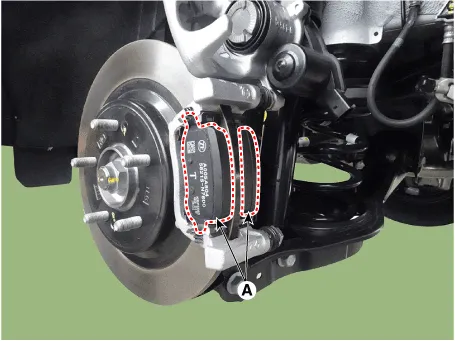
9.Remove the brake caliper body (A) by loosening the upper bolt of the brake caliper guide.
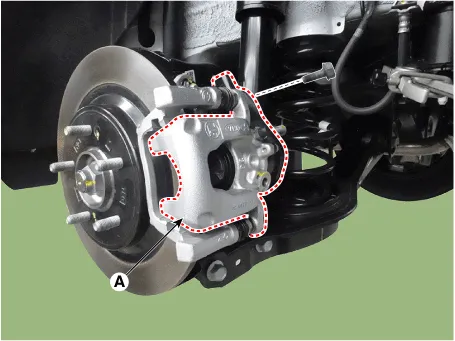
10.Remove the caliper carrier (A) after loosening the caliper mounting bolt.
Tightening torque :98.1 - 117.7 N.m (10.0 - 12.0 kgf.m, 72.3 - 86.8 lb-ft)
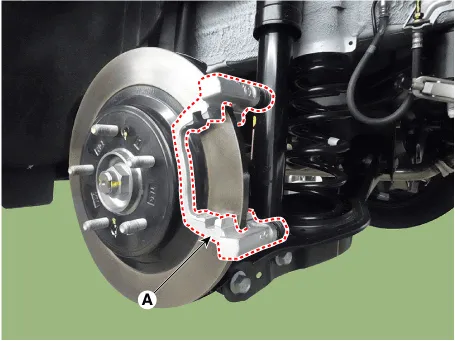
11.Remove the rear brake disc (A) after loosening the screw.
Tightening torque :4.9 - 5.9 N.m (0.5 - 0.6 kgf.m, 3.6 - 4.3 lb-ft)
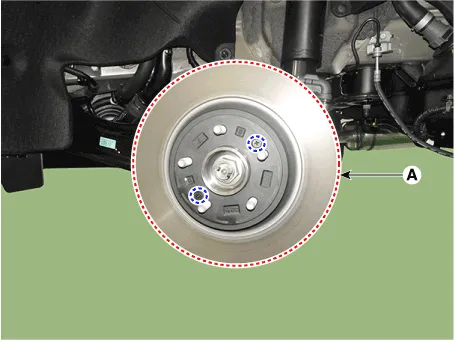
1.Check the brake disc for damage and cracks.
2.Remove all rust and contamination from the surface, and measure the disc thickness (A) at 24 points, at least, of same distance 10 mm (0.39 in) from the brake disc outer circle.
Rear brake disc thickness- Standard (Solid disc) : 12 mm (0.47 in.)- Service Limit : 10.0 mm (0.39 in.)Difference in thickness of each measuring part : Less than 0.015 mm (0.0006 in.) (Circumferential direction), 0.015 mm (0.0006 in.) (Radial)
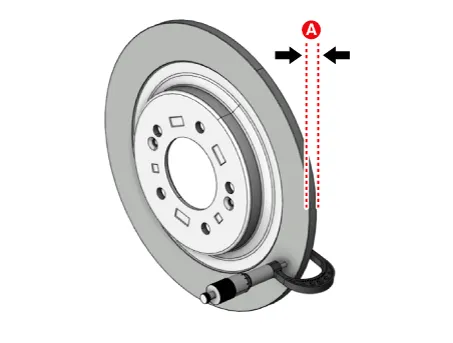
3.If wear exceeds the limit, replace the discs and pad assembly left and right of the vehicle.
1.Place a dial gauge about 10 mm (0.39 in.) from the outer circumference of the brake disc, and measure the runout of the disc.
Brake disc runoutLimit : 0.055 mm (0.0022 in.) or less (new one)
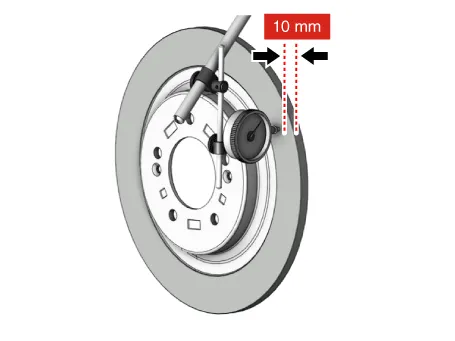
2.If the runout of the brake disc exceeds the limit specification, replace the disc, and then measure the runout again.
3.If the runout cannot be corrected by changing the position of the brake disc, replace the brake disc.
1.Install in the reverse order of removal.
2.When istalling, press and rotate the piston into the caliper body until it is fully retracted.
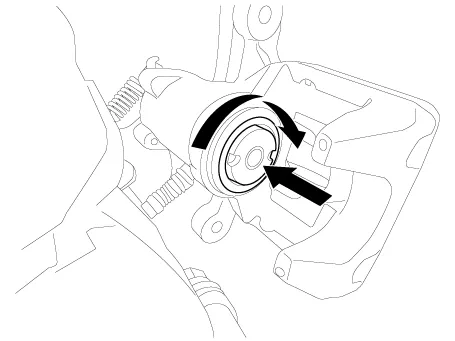
3.After installing the rear caliper, perform “Brake Pad Replacement Mode” using the self-diagnosis. [EPB Apply]
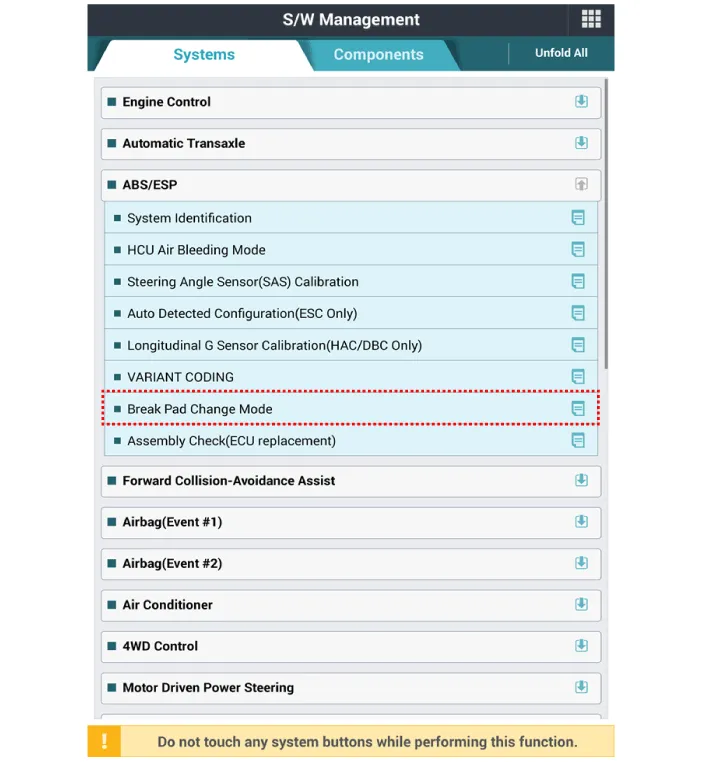
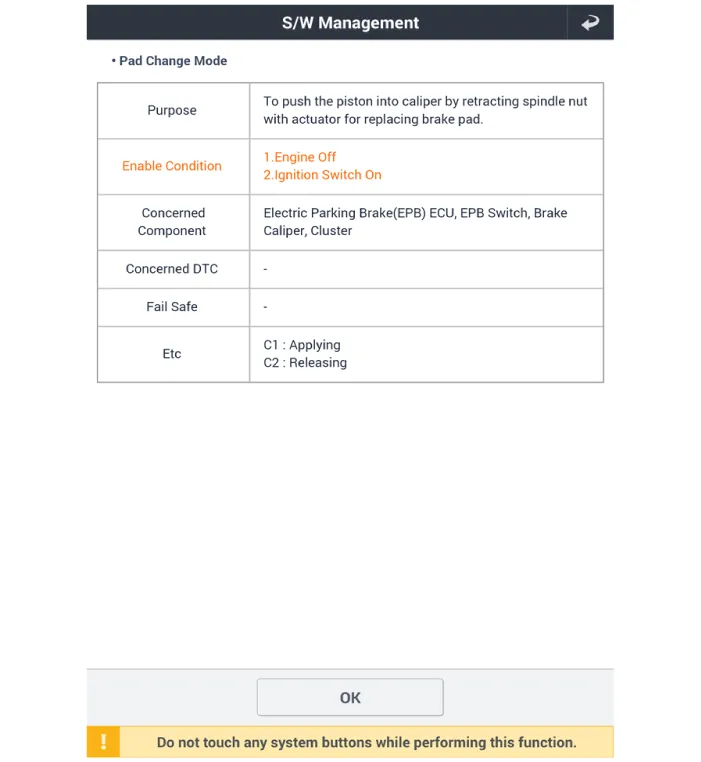
4.Select C1 (Apply) on the screen below.
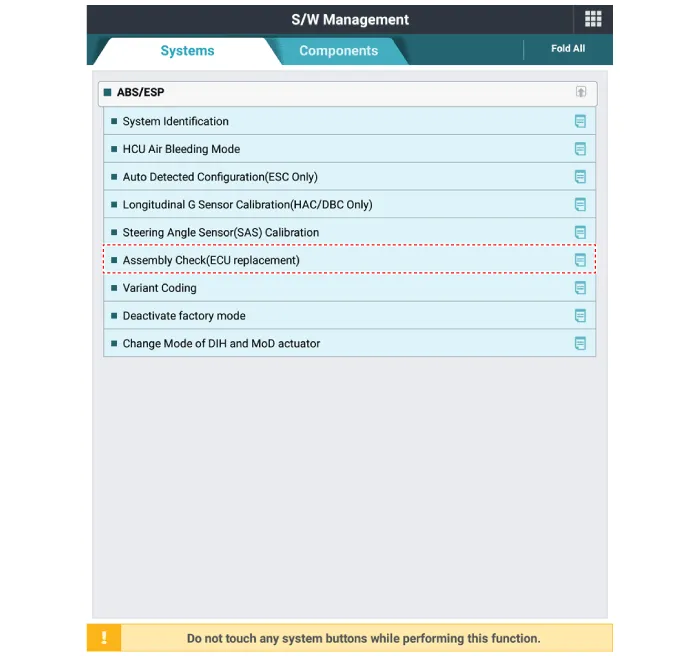
5.After replacing the rear caliper, make sure that the caliper is installed correctly by performing "Check assembling (ECU replaced)" from the option
6.After disassembling/assembling the caliper body or replacing the brake caliper, parking brake cable or brake disc, re-adjust the parking brake. [EPB None Apply]
7.Apply the parking brake several times and check for normal operation.
8.Check if the parking brake is operating normally.
 Rear Brake Caliper
- Components
1. EPB Actuator2. Caliper body3. Caliper carrier4. Pad return spring5. Brake pad
- Removal
1.Before removing the rear caliper, perform “Brake Pad Replacement
Mode” usin ...
 Brake Pad
- Replacement
• Be careful not to damage the parts located under the vehicle
(floor under cover, fuel filter, fuel tank and canister) when raising
the vehicle using the li ...
Other information:
Hyundai Santa Cruz 2021-2025 Owners Manual: Tie Down
Tie Down Locations
[A] Fixed Tie Down
[B] D-Ring
You can secure cargo to the vehicle using
hooks, ropes and straps with heavy duty
tie downs from various location on the
pickup bed.
Fixed Tie Down also acts as a Cleat for
looping rope.
D-Ring can be rotated about the bolt
and the bracket. ...
Hyundai Santa Cruz (NX4A OB) 2021-2025 Service Manual: Downhill Brake Control Swtich
- Description
The DBC function is the acronym word of Downhill Brake Control
function. When a vehicle goes down the hill, just pushing the DBC switch
enables the car to keep its vehicle's speed at a constant value without
operating the brake pedal. The DBC function is operat]ed when the
v ...
