Hyundai Santa Cruz: Rear Suspension System / Rear Shock Absorber
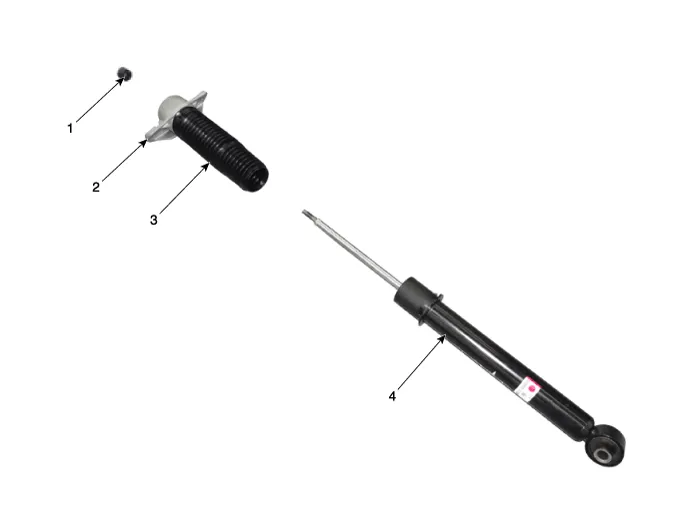
1. Lock nut
2. Insulator assembly
3. Dust cover
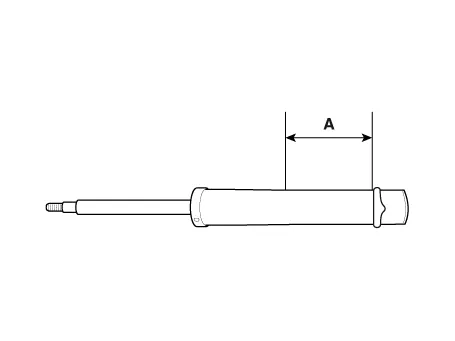
4. Rear shock absorber

• When lifting a vehicle using a lift, be careful not to damage the lower parts of the vehicle (floor under cover, fuel filter, fuel tank, canister).(Refer to General Information - "Lift and Support Points")
1.Loosen the rear wheel nuts slightly.Raise the vehicle, and make sure it is securely supported.
2.Remove the rear wheel and tire.(Refer to Tires/Wheels - "Wheel")
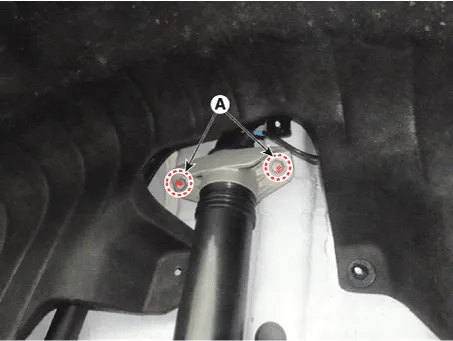
3.Loosen the rear shock absorber mounting bolts (A).
Tightening torque :117.6 - 137.2 N.m (12.0 - 14.0 kgf.m, 86.8 - 101.2 lb-ft)
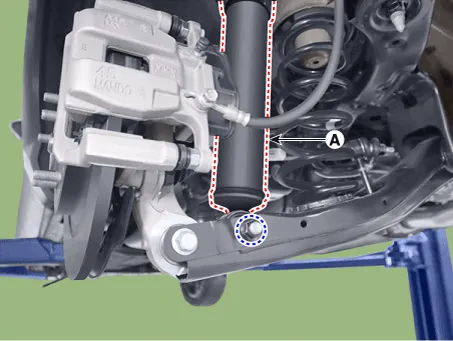
4.Remove the rear shcok absorber (A) from the rear lower arm after loosening the mounting bolt and nut.
Tightening torque :156.9 - 176.5 N.m (16.0 - 18.0 kgf.m, 115.7 - 130.2 lb-ft)
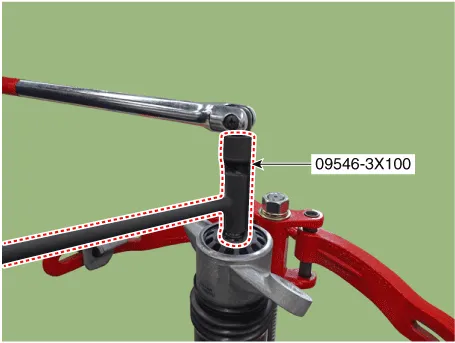
1.Using the special tool (09546-3X100), install the self locking nut.

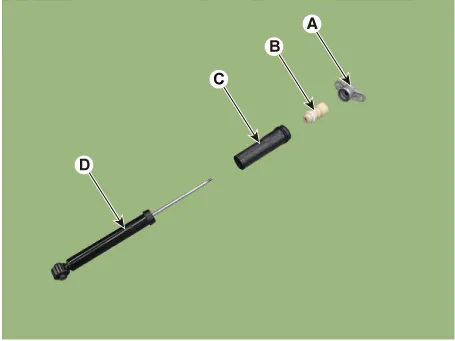
2.Separate the Insulator assembly (A), bumper rubber (B), dust cover (C), shock absorber (D).
1.Check the rubber parts for damage or deterioration.
2.Check the shock absorber for abnormal resistance or unusual sounds.

1.Fully extend the shock absorber rod.
2.Drill a hole to remove gas from the cylinder (A).

• The gas corning out is harmless, but be careful of chips that may fly when drilling. Be sure to use face shield and safety goggles.
1.To reassembly, reverse the disassembly procedure.
2.Using SST (09546-3X100), install the lock nut.

• Do not reuse the self locking nut.
Tightening torque :19.6 - 24.5 N.m (2.0 - 2.5 kgf.m, 14.5 - 18.1 lb-ft)
1.To install, reverse the removal procedures.
 Components and Components Location
- Components
[2WD]
1. Rear shock absorber2. Rear lower arm3. Rear stabilizer bar4. Rear sub frame 5. Rear upper arm 6. Rear assist arm 7. Trailing arm
[4WD]
1. Rear shock absorber2. Re ...
 Rear Upper Arm
- Removal
• When lifting a vehicle using a lift, be careful not to damage
the lower parts of the vehicle (floor under cover, fuel filter, fuel
tank, canister).(Refer to Ge ...
Other information:
Hyundai Santa Cruz 2021-2025 Owners Manual: If the Engine Overheats
If your temperature gauge indicates
overheating, you experience a loss of
power, or hear loud pinging or knocking,
the engine may be overheating. If this
happens, you should:
1. Pull off the road and stop as soon as it
is safe to do so.
2. Shift the gear to P (Park) and set the
parking brake. ...
Hyundai Santa Cruz 2021-2025 Owners Manual: Tilt / Telescopic Steering
When adjusting the steering wheel to a
comfortable position, adjust the steering
wheel so that it points toward your chest,
not toward your face. Make sure you can
see the instrument cluster warning lights
and gauges. After adjusting, push the
steering wheel both up and down to be
certain it ...
