Hyundai Santa Cruz: Timing System / Timing Chain
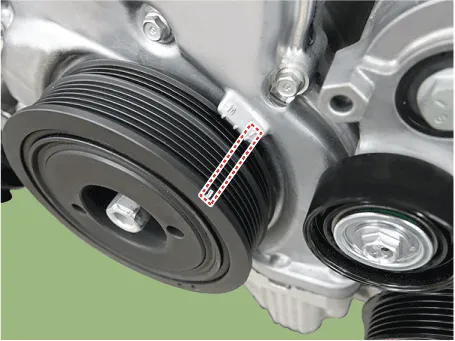
1.Set No.1 cylinder to TDC. Turn the crankshaft damper pulley clockwise and align its groove with the timing mark "T" of the lower timing chain cover.
2.Remove the timing chain cover.(Refer to Timing System - "Timing Chain Cover")
3.Make sure that the key of crankshaft is aligned with the mounting surface of the lower crankcase in a straight line. Check that the No.1 piston is positioned at the TDC.

4.Check that the timing marks of the intake camshaft sprocket and the exhaust camshaft sprocket are in line.


• If timing marks are not in line, turn the crankshaft clockwise one revolution (360°). (Do not rotate engine counterclockwise.)
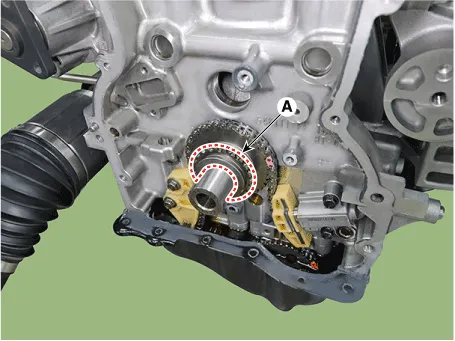
5.When remove the tensioner, check the ratchet function of the tensioner after installing the fixing pin by retracting the tensioner arm (A) maximally as shown below.
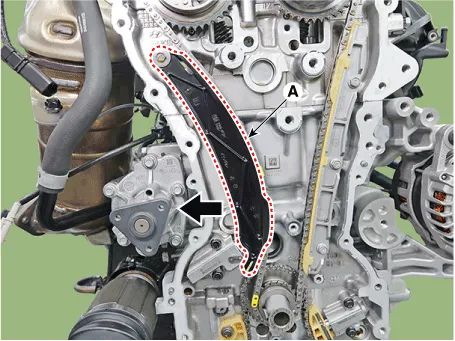
6.Remove the timing chain tensioner (A).


• Be careful not to pop out the piston when removing the tensioner.
7.Remove the timing chain tensioner arm (A).
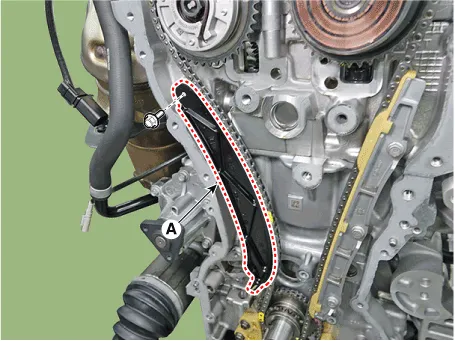
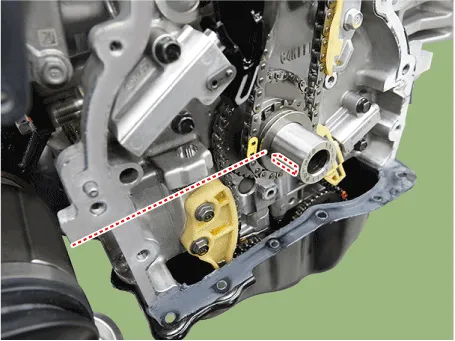
8.Remove the timing chain cam to cam guide (A).
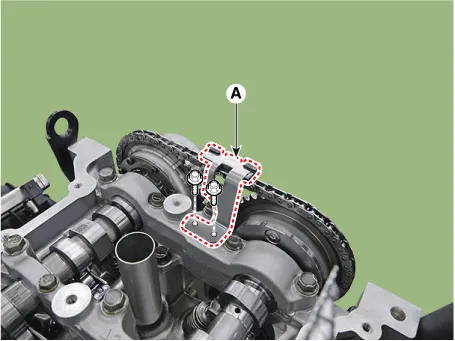
9.Remove the timing chain (A).

10.Remove the timing chain guide (A).

11.Remove the crankshaft chain sprocket (A) for the timing chain.
1.Check the CVVT sprocket, crankshaft sprocket teeth for abnormal wear, cracks or damage.Replace if necessary.
2.Check a contact surface of the chain tensioner arm and guide for abnormal wear, cracks or damage. Replace if necessary.
3.Check that the chain tensioner piston slides smoothly and inspect whether the ratchetoperates normally. Replace if necessary.
1.Install the crankshaft chain sprocket (A) for the timing chain.

2.Make sure that the key of crankshaft is aligned with the mouting surface of the lower crankcase. Ensure that the TDC mark on the front of the intake/exhaust CVVT sprockets match with the top of the cylinder head.
3.Install the timing chain guide (A).
Tightening torque :9.8 - 11.7 N.m (1.0 - 1.2 kgf.m, 7.2 - 8.6 Ib.ft)
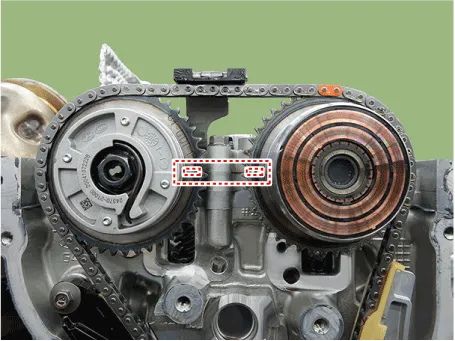
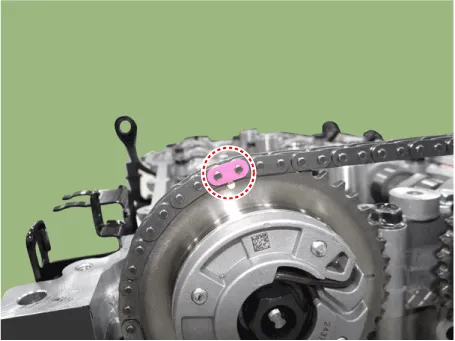
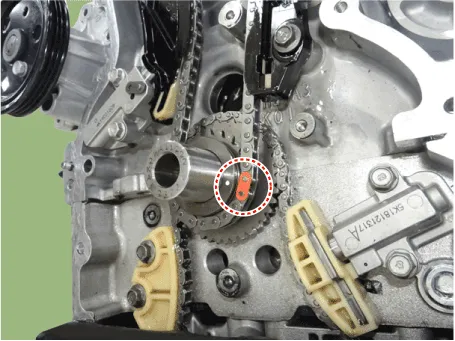
4.Install the timing chain (A).Crankshaft sprocket → Timing chain guide → Intake CVVT sprocket → Exhaust CVVT sprocket.


• When installing the timing chain, be sure that the timing mark
of each sprocket is matched with the timing mark (color link) of the
timing chain.

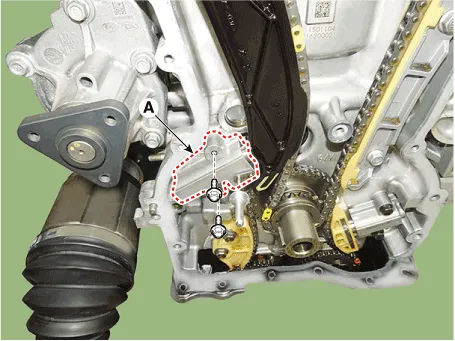
5.Install the timing chain cam to cam guide (A).
Tightening torque :9.8 - 11.7 N.m (1.0 - 1.2 kgf.m, 7.2 - 8.6 Ib.ft)

6.Install the timing chain tensioner arm (A).
Tightening torque :9.8 - 11.7 N.m (1.0 - 1.2 kgf.m, 7.2 - 8.6 Ib.ft)

7.Install the timing chain auto tensioner (A) and pull out pins.
Tightening torque :9.8 - 11.7 N.m (1.0 - 1.2 kgf.m, 7.2 - 8.6 Ib.ft)
8.Rotate the crankshaft 2 revolutions in clockwise direction. Ensure that the TDC mark on the front of the intake/exhaust CVVT sprockets match with the top of the cylinder head.


• If timing marks are not in line, turn the crankshaft clockwise one revolution (360°). (Do not rotate engine counterclockwise.)
9.Install the timing chain cover.(Refer to Timing System - "Timing Chain Cover")
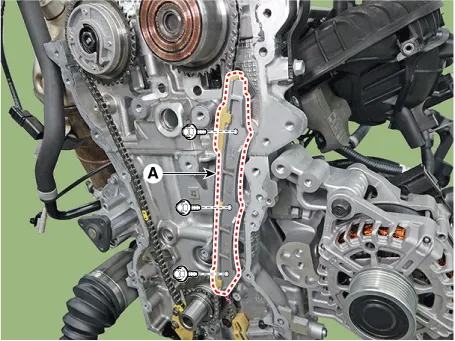
 Timing Chain Cover
- Removal
• In case of removing the high pressure fuel pump, high pressure
fuel pipe, delivery pipe, and injector, there may be injury caused by
leakage of the high pressu ...

Other information:
Hyundai Santa Cruz 2021-2025 Owners Manual: Check Tire Pressure
You can check the tire pressure in the
Warning mode on the cluster.
Tire pressure is displayed after a few
minutes of driving after initial engine
start up.
If tire pressure is not displayed when
the vehicle is stopped, “Drive to
display” message will appear. After
driving, chec ...
Hyundai Santa Cruz 2021-2025 Owners Manual: Trailer Towing Equipment
Hitches
Information
The mounting hole for hitches are located
on both sides of the underbody behind the
rear tires.
It’s important to have the correct hitch
equipment. Crosswinds, large trucks
going by, and rough roads are a few
reasons why you’ll need the right hitch.
Here are some rules ...
