Hyundai Santa Cruz: Engine Control System / Camshaft Position Sensor (CMPS)
| Item | Specification |
| Air Gap [mm(in)] | 0.5 - 1.5 (0.01 - 0.05) |

1.Check the signal waveform of the CMPS and CKPS using the diagnostic tool.
Specification : Refer to "DTC Diagnostic Guide"
1.Turn the ignition switch OFF and disconnect the battery negative (-) terminal.
2. Remove the Engine Cover.(Refer to Engine Mechanical System - "Engine Cover")
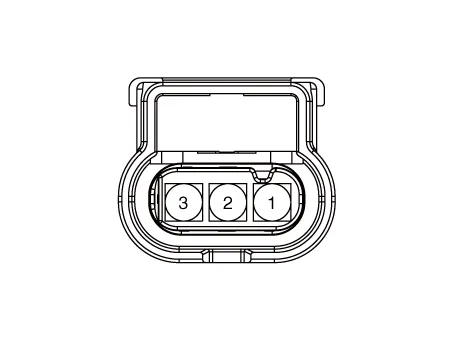
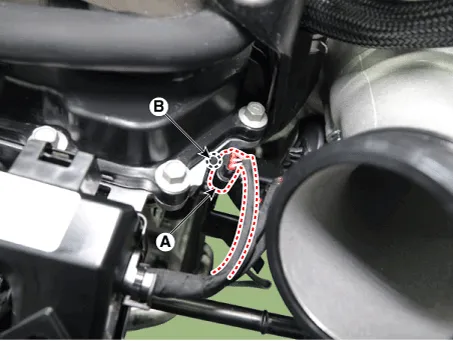
3. Disconnect the camshaft position sensor connector (A).
4. Remove the installation bolt (B), and then remove the crankshaft position sensor.
Tightening torque :9.8 - 11.7 N.m (1.0 - 1.2 kgf.m, 7.2 - 8.6 lb-ft)
1.Turn the ignition switch OFF and disconnect the battery negative (-) terminal.
2. Remove the air cleaner assembly.(Refer to Engine Mechanical System - "Air Cleaner")
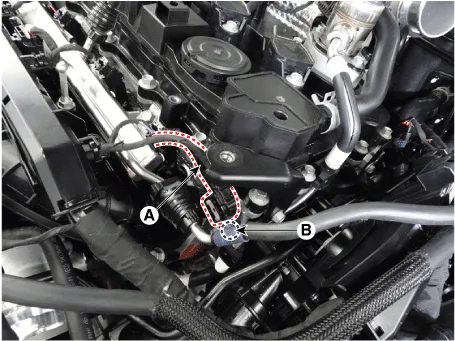
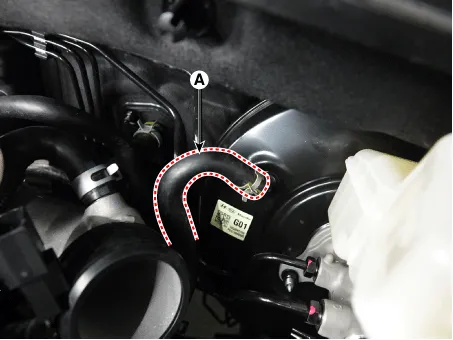
3. Disconnect the vacuum hose (A).
4.Loosening the bolt (B), and remove the engine hanger braket (A).
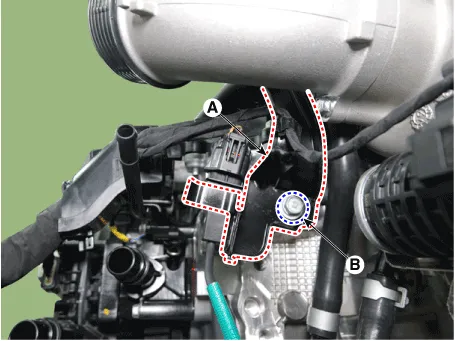
5.Disconnect the camshaft position sensor connector (A).
6.Remove the installation bolt (B), and then remove the crankshaft position sensor.
Tightening torque :9.8 - 11.7 N.m (1.0 - 1.2 kgf.m, 7.2 - 8.6 lb-ft)

• Install the component to the specified torques.
• If a part is dropped, replace it with a new one and discard the dropped part as invisible damage may be caused.
• Apply the engine oil to the O-ring.
• Insert the sensor in the installation hole and be careful not to damage it.
• Be careful not to damage the sensor housing and the connector.
• Be careful not to damage the O-ring.
1.Install in the reverse order of removal.
 Crankshaft Position Sensor (CKPS)
- Description
Crankshaft Position Sensor (CKPS) detects the crankshaft position and
is one of the most important sensors of the engine control system. If
there is no CKPS signal input, the engi ...
 Knock Sensor (KS)
- Description
Knocking is a phenomenon characterized by undesirable vibration and
noise that can cause engine damage. Knock Sensor (KS) is installed on
the cylinder block and senses engine knoc ...
Other information:
Hyundai Santa Cruz 2021-2025 Owners Manual: Hyundai Digital Key
Digital Key Application
To use Hyundai Digital Key mobile app,
you should install the Hyundai Digital
Key app on your Android phone. Search
‘Hyundai digital key’ in the Google Play
Store and download the app. Please refer
to the detailed manual of the digital key
app. The option can be fou ...
Hyundai Santa Cruz 2021-2025 Owners Manual: Instrument Panel Overview
1. Instrument cluster
2. Driver’s front air bag
3. Key ignition switch/Engine Start/Stop button
4. Infotainment system
5. Hazard warning lamp switch
6. Climate control system
7. Air ventilation seat
8. Seat warmer
9. Heated steering wheel
10. Transmission shift lever
11. DBC button
12. Parking/V ...
