Hyundai Santa Cruz: Front Seat / Front Seat Shiled Outer Cover
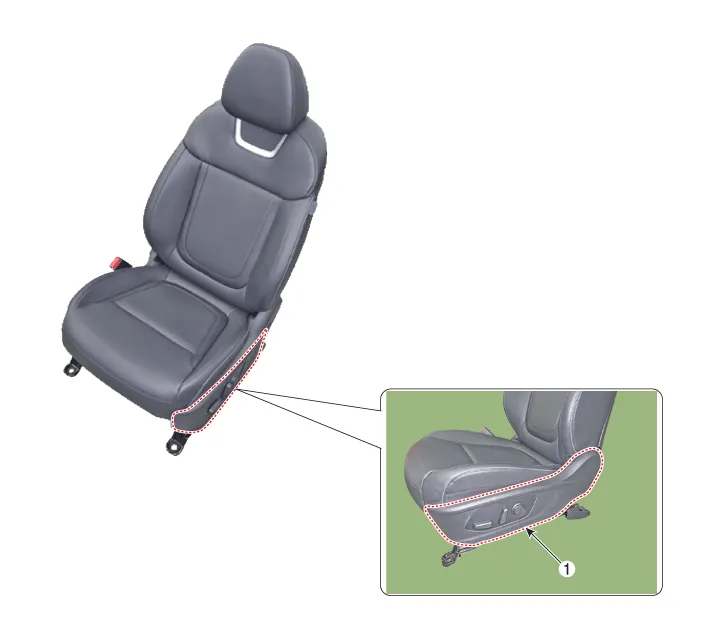
1. Front seat shield outer cover

• When removing with a flat-tip screwdriver or remover, wrap protective tape around the tools to prevent damage to components.
• Put on gloves to prevent hand injuries.

• Take care not to bend or scratch the trim and panels.
1.Remove the front seat assembly. (Refer to Front Seat - "Front Seat Assembly")
2.Remove the front seat outer shield cover.
(1)Separate the clip (C) and hook (D).
(2)Press the lock pin (B), remove the front seat outer shield cover (A) by pulling it forward as shown by the arrow.
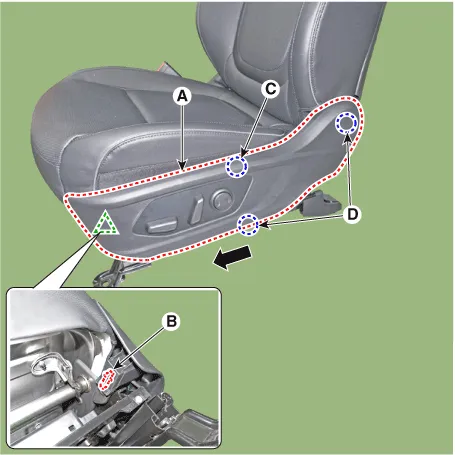
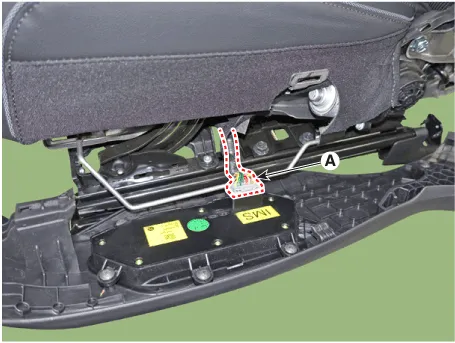
3.Disconnect the front seat power swich connector (A).
4.To install, reverse removal procedure.

• Make sure the connector is plugged in properly.
• Replace any damaged clips (or pin-type retainers).
 Front Seat Assembly
- Component Location
1. Front seat assembly
- Replacement
1.Disconnect the negative (-) battery terminal.
2.Open the cover and loosen the front seat mounting bolts.[Front]
Tightening ...
 Front Seat Shield Inner Cover
- Component Location
1. Front seat shield inner cover
- Replacement
• When removing with a flat-tip screwdriver or remover, wrap protective tape around the tools to ...
Other information:
Hyundai Santa Cruz 2021-2025 Owners Manual: Front Lamps
1. Front map lamp ():
Touch either lenses to turn the map
lamp on or off. This light produces a spot
beam for convenient use as a map lamp
at night or as a personal lamp for the
driver and the front passenger.
2. Door lamp ():
The front or rear room lamps come on
when the front or rear doors a ...
Hyundai Santa Cruz (NX4A OB) 2021-2025 Service Manual: Crankshaft Position Sensor (CKPS)
- Description
Crankshaft Position Sensor (CKPS) detects the crankshaft position and
is one of the most important sensors of the engine control system. If
there is no CKPS signal input, the engine may stop because of CKPS
signal missing. This sensor is installed on the transaxle housing and ...
