Hyundai Santa Cruz: Sunroof / Sunroof Assembly
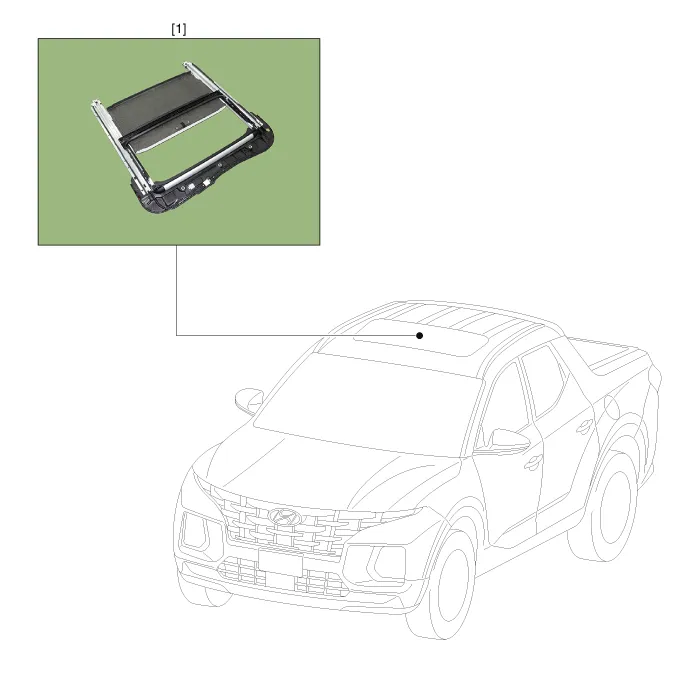
1. Sunroof assembly

• When removing with a flat - tip screwdriver or remover, wrap protective tape around the tools to prevent damage to components.
• Put on glove to protect your hands.
1.Remove the roof trim.(Refer to Roof Trim - "Roof Trim Assembly")
2.Remove the sunroof glass.(Refer to Sunroof - "Sunroof Glass")
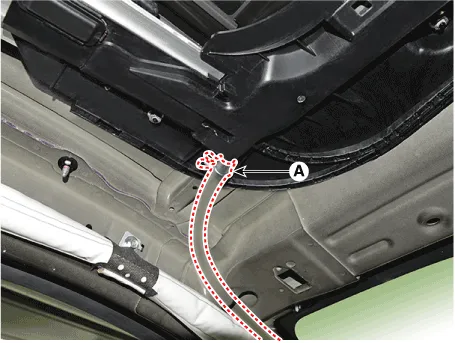
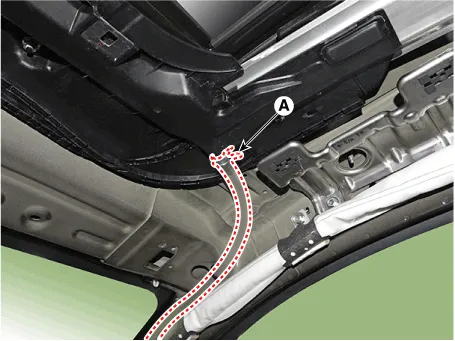
3.Separate the drain hose (A).
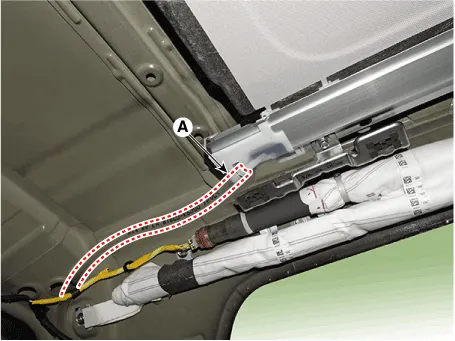
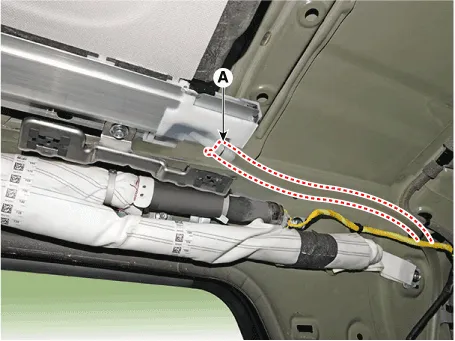
4.Disconnect the sunroof motor connector (A).
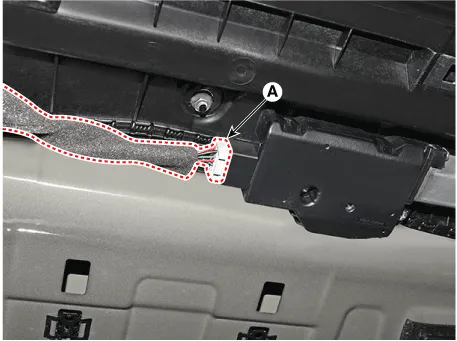
5.Loosen the mounting bolts, nuts and then remove the assist handle bracket (A).
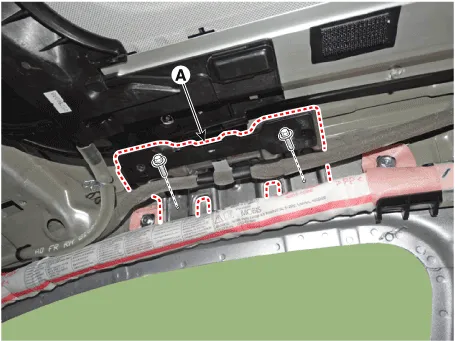
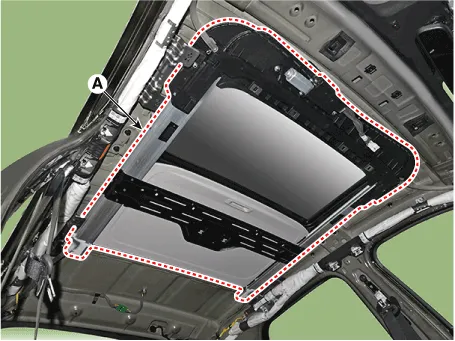
6.Loosen the mounting bolts, nuts and then remove the sunroof assembly (A).
Tightening torque : Bolt : 7.8 - 11.8 N.m (0.8 - 1.2 kgf.m, 5.8 - 8.7 lb-ft)Nut : 3.9 - 5.9 N.m (0.4 - 0.6 kgf.m, 2.9 - 4.3 lb-ft)
7.To install, reverse the removal procedure.

• Make sure to initialize the motor.
 Sunroof Deflector
- Replacement
1.Open the glass fully.
2.Remove the mounting pins (C), from the frame (B), and then remove the deflector (A).
3.To install, reverse the removal procedure. ...
 Sunroof Sunshade
- Replacement
1.Remove the sunroof assembly.(Refer to Sunroof - "Sunroof Assembly")
2.Remove the drip rail (A).
3.Remove the rear drip (A).
4.Remove the sunshade stoper (A).
5.Remove the ...
Other information:
Hyundai Santa Cruz (NX4A OB) 2021-2025 Service Manual: Oil Level Gauge & Pipe
- Removal and Installation
1.Remove the oil level gauge (A).
2.Remove the timing chain cover.(Refer to Timing System - "Timing Chain Cover")
3.Remove the oil level gauge guide (A).Tightening torque : 7.8 - 11.8 N.m (0.8 - 1.2 kgf.m, 5.8 - 8.7 lb-ft)
4.Install in the reverse order of re ...
Hyundai Santa Cruz (NX4A OB) 2021-2025 Service Manual: Brake Booster
- Components
1. Reservoir cap2. Reservoir3. Brake booster4. Master cylinder5. Push rod
- Brake Booster Operating Test
1.Run the engine for one or two minutes, and then stop it. If the
pedal depresses fully the first time but gradually becomes higher when
depressed succeeding times, ...
